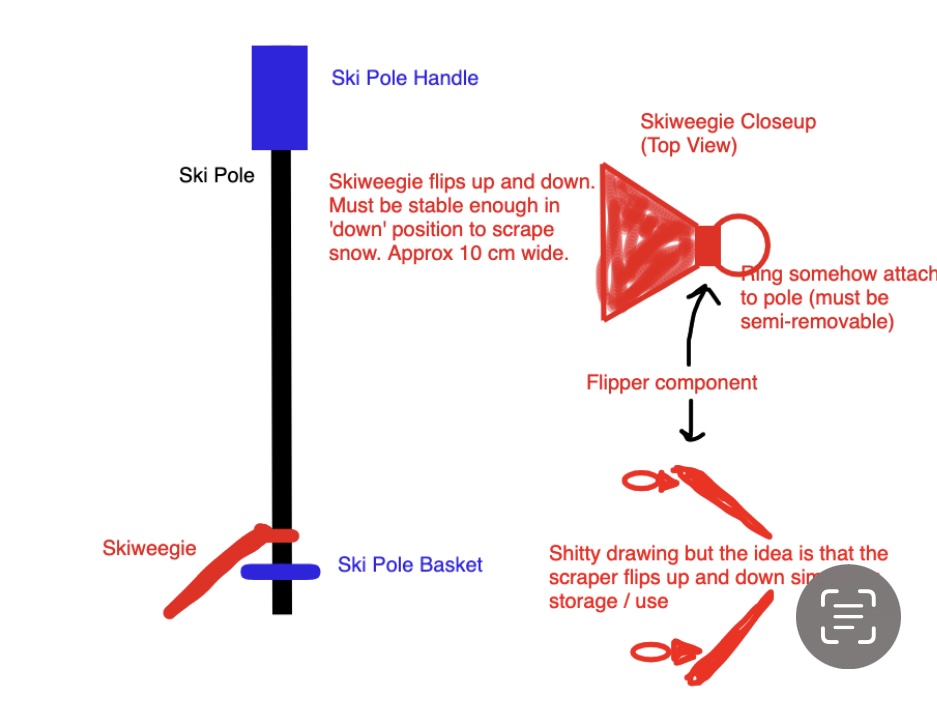
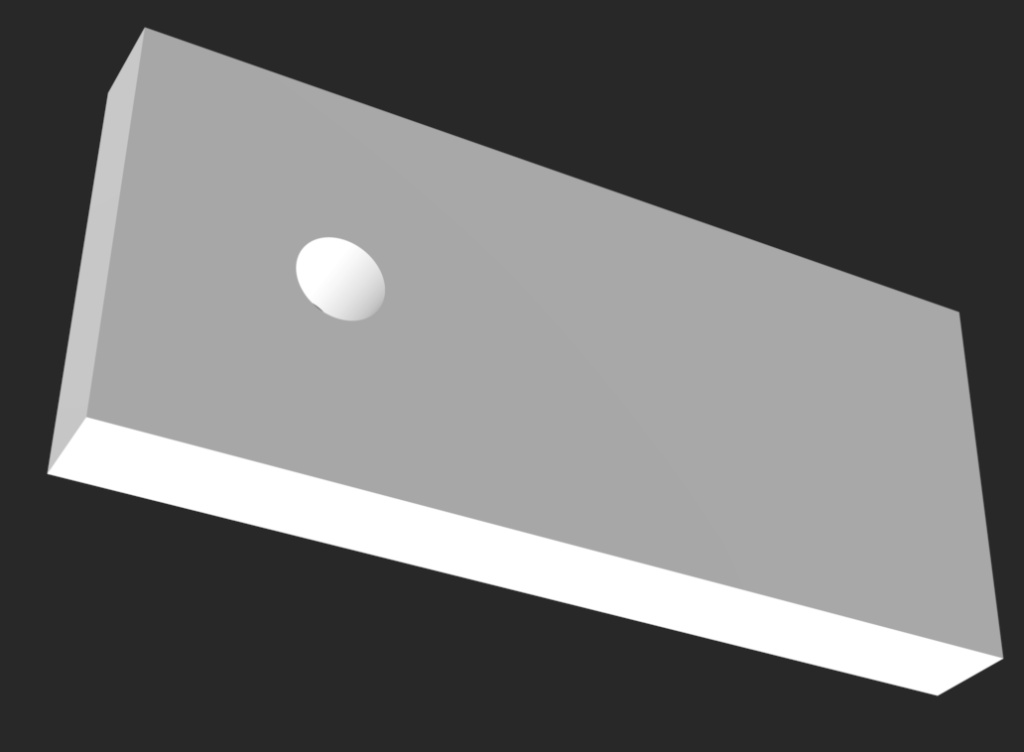
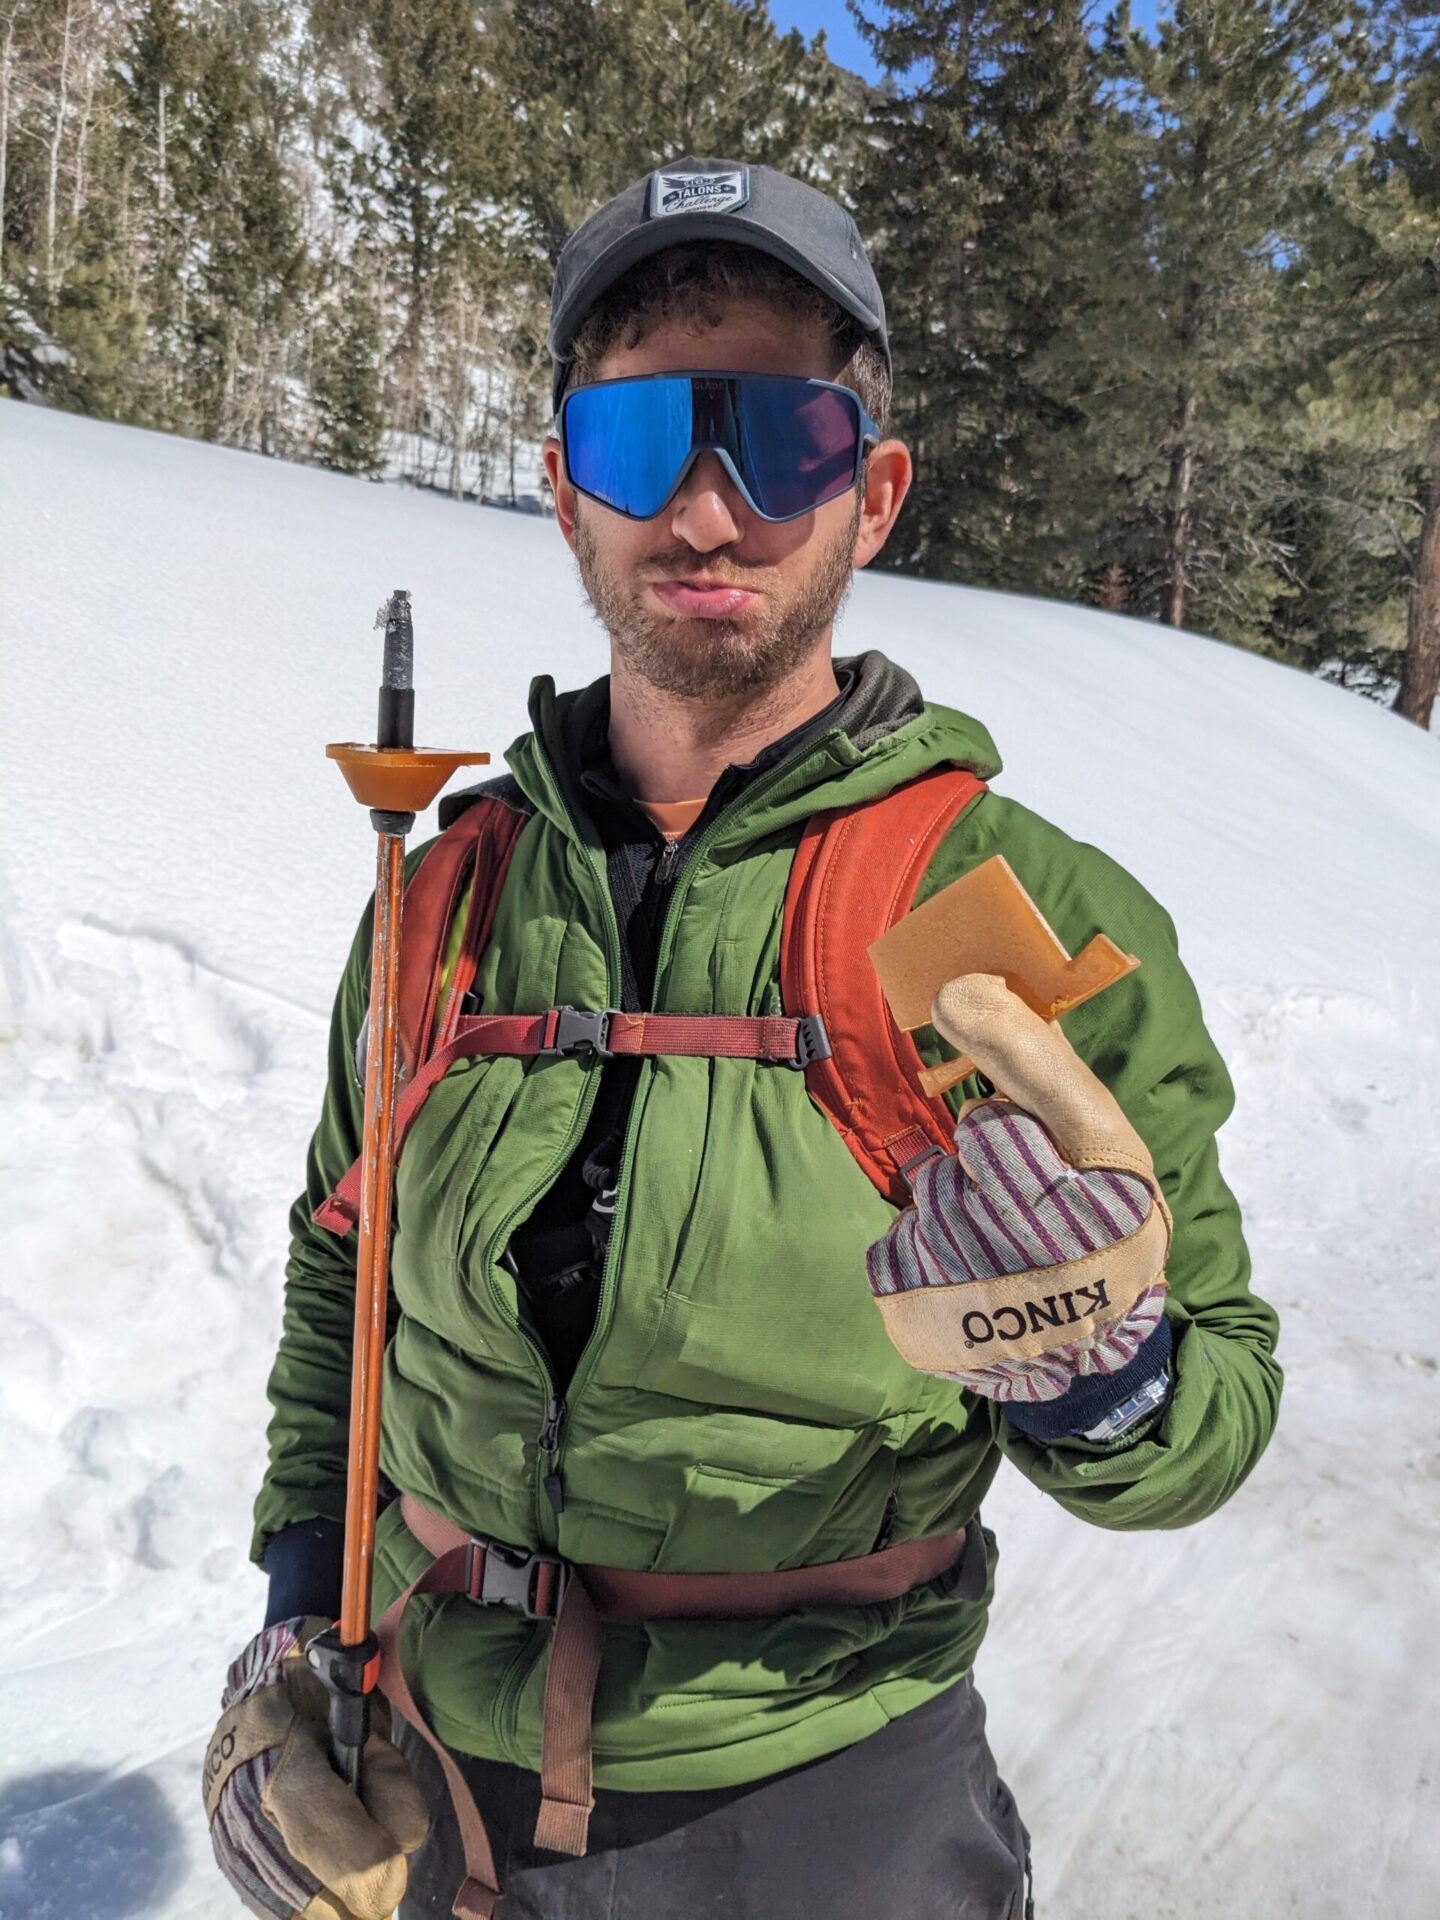
Skiweegie
The Skiweegie (working name) is one of my pet projects: a ski basket that has added functionality for the backcountry skier.
Product Pitch
Backcountry skiers often pay extra for lightweight equipment (skis, boots, bindings, etc.) that is just a little bit lighter to make their uphill treks a little easier / faster / more enjoyable. Unfortunately, snow tends to gather on those lightweight skis on the uphills, adding significant weight. Stomping, shaking the ski, or jabbing with a ski pole are only mildly effective in removing this snow and most BC skiers have just accepted the extra weight.
In comes the Skiweegie: A ski basket with a squeegee / scraper end to push the snow off your skis, without having to break your stride.
While other ski baskets serve only one purpose (to stop your pole from lodging itself too deep into the snow), the Skiweegie will have additional functionality:
- The squeegee / scraper to remove snow on ski top sheet (primary job)
- Skin-scraper (you can ‘ski’ over the basket to remove clumped up snow that has gathered on your skin… or just mash at it to scrape it to the extent possible)
- Riser / binding adjustments (use basket to quickly adjust risers, saving time and energy)
- Anti-snow gathering properties (repels snow from gathering on top of or beneath basket, a common issue with other baskets)
I am targeting Spring 2025 for a sellable product; however, at the time of this post creation (Spring 2024) I have begun to produce working prototypes and I intend to share those with anyone willing to test. Please reach out to me if you’d be interested in testing an early prototype.
Updates
March 2024 – First Skiweegees Sold to Testers
New name for the product: The Skiweegee (ee’s instead of ie).
I posted a video to Reddit, which got almost 100k views right away and the response was overwhelmingly positive. I quickly used the opportunity sell Skiweegees (at cost) to testers in exchange for feedback. I sold over 100 and then shut down to give myself time to make design changes as needed.
The biggest feedback I got was that the product was heavy and that snow clumped underneath — both problems I aim to solve!
Also a guy from a pole company reached out to potentially do a collaboration. More to come but I think he’ll at least be able to offer me some guidance regarding getting my product into proper production.
The next major steps for me are:
1) Create an informational video on the product,
2) resolve the weight and snow-clumping issues, and
3) determine how to get these into ‘real’ production (injection molding).
I also put time into developing the GogShield—a simple plastic insert that adds hard protection behind your goggle sock to prevent lens scratches. I sent a few out with Skiweegee orders and made a quick how-to video for users.
 before making design for testers (P1)")


")

 is 40% lighter and snow-clumps a lot less!")

Feb 2024 Testing Updates & New Models
This month I’ve tested my previous baskets as well as some new ones and I’m already working up my next batch. First, let’s catch up on the Delta, Hinge, and L’Weegie!
January Model Update
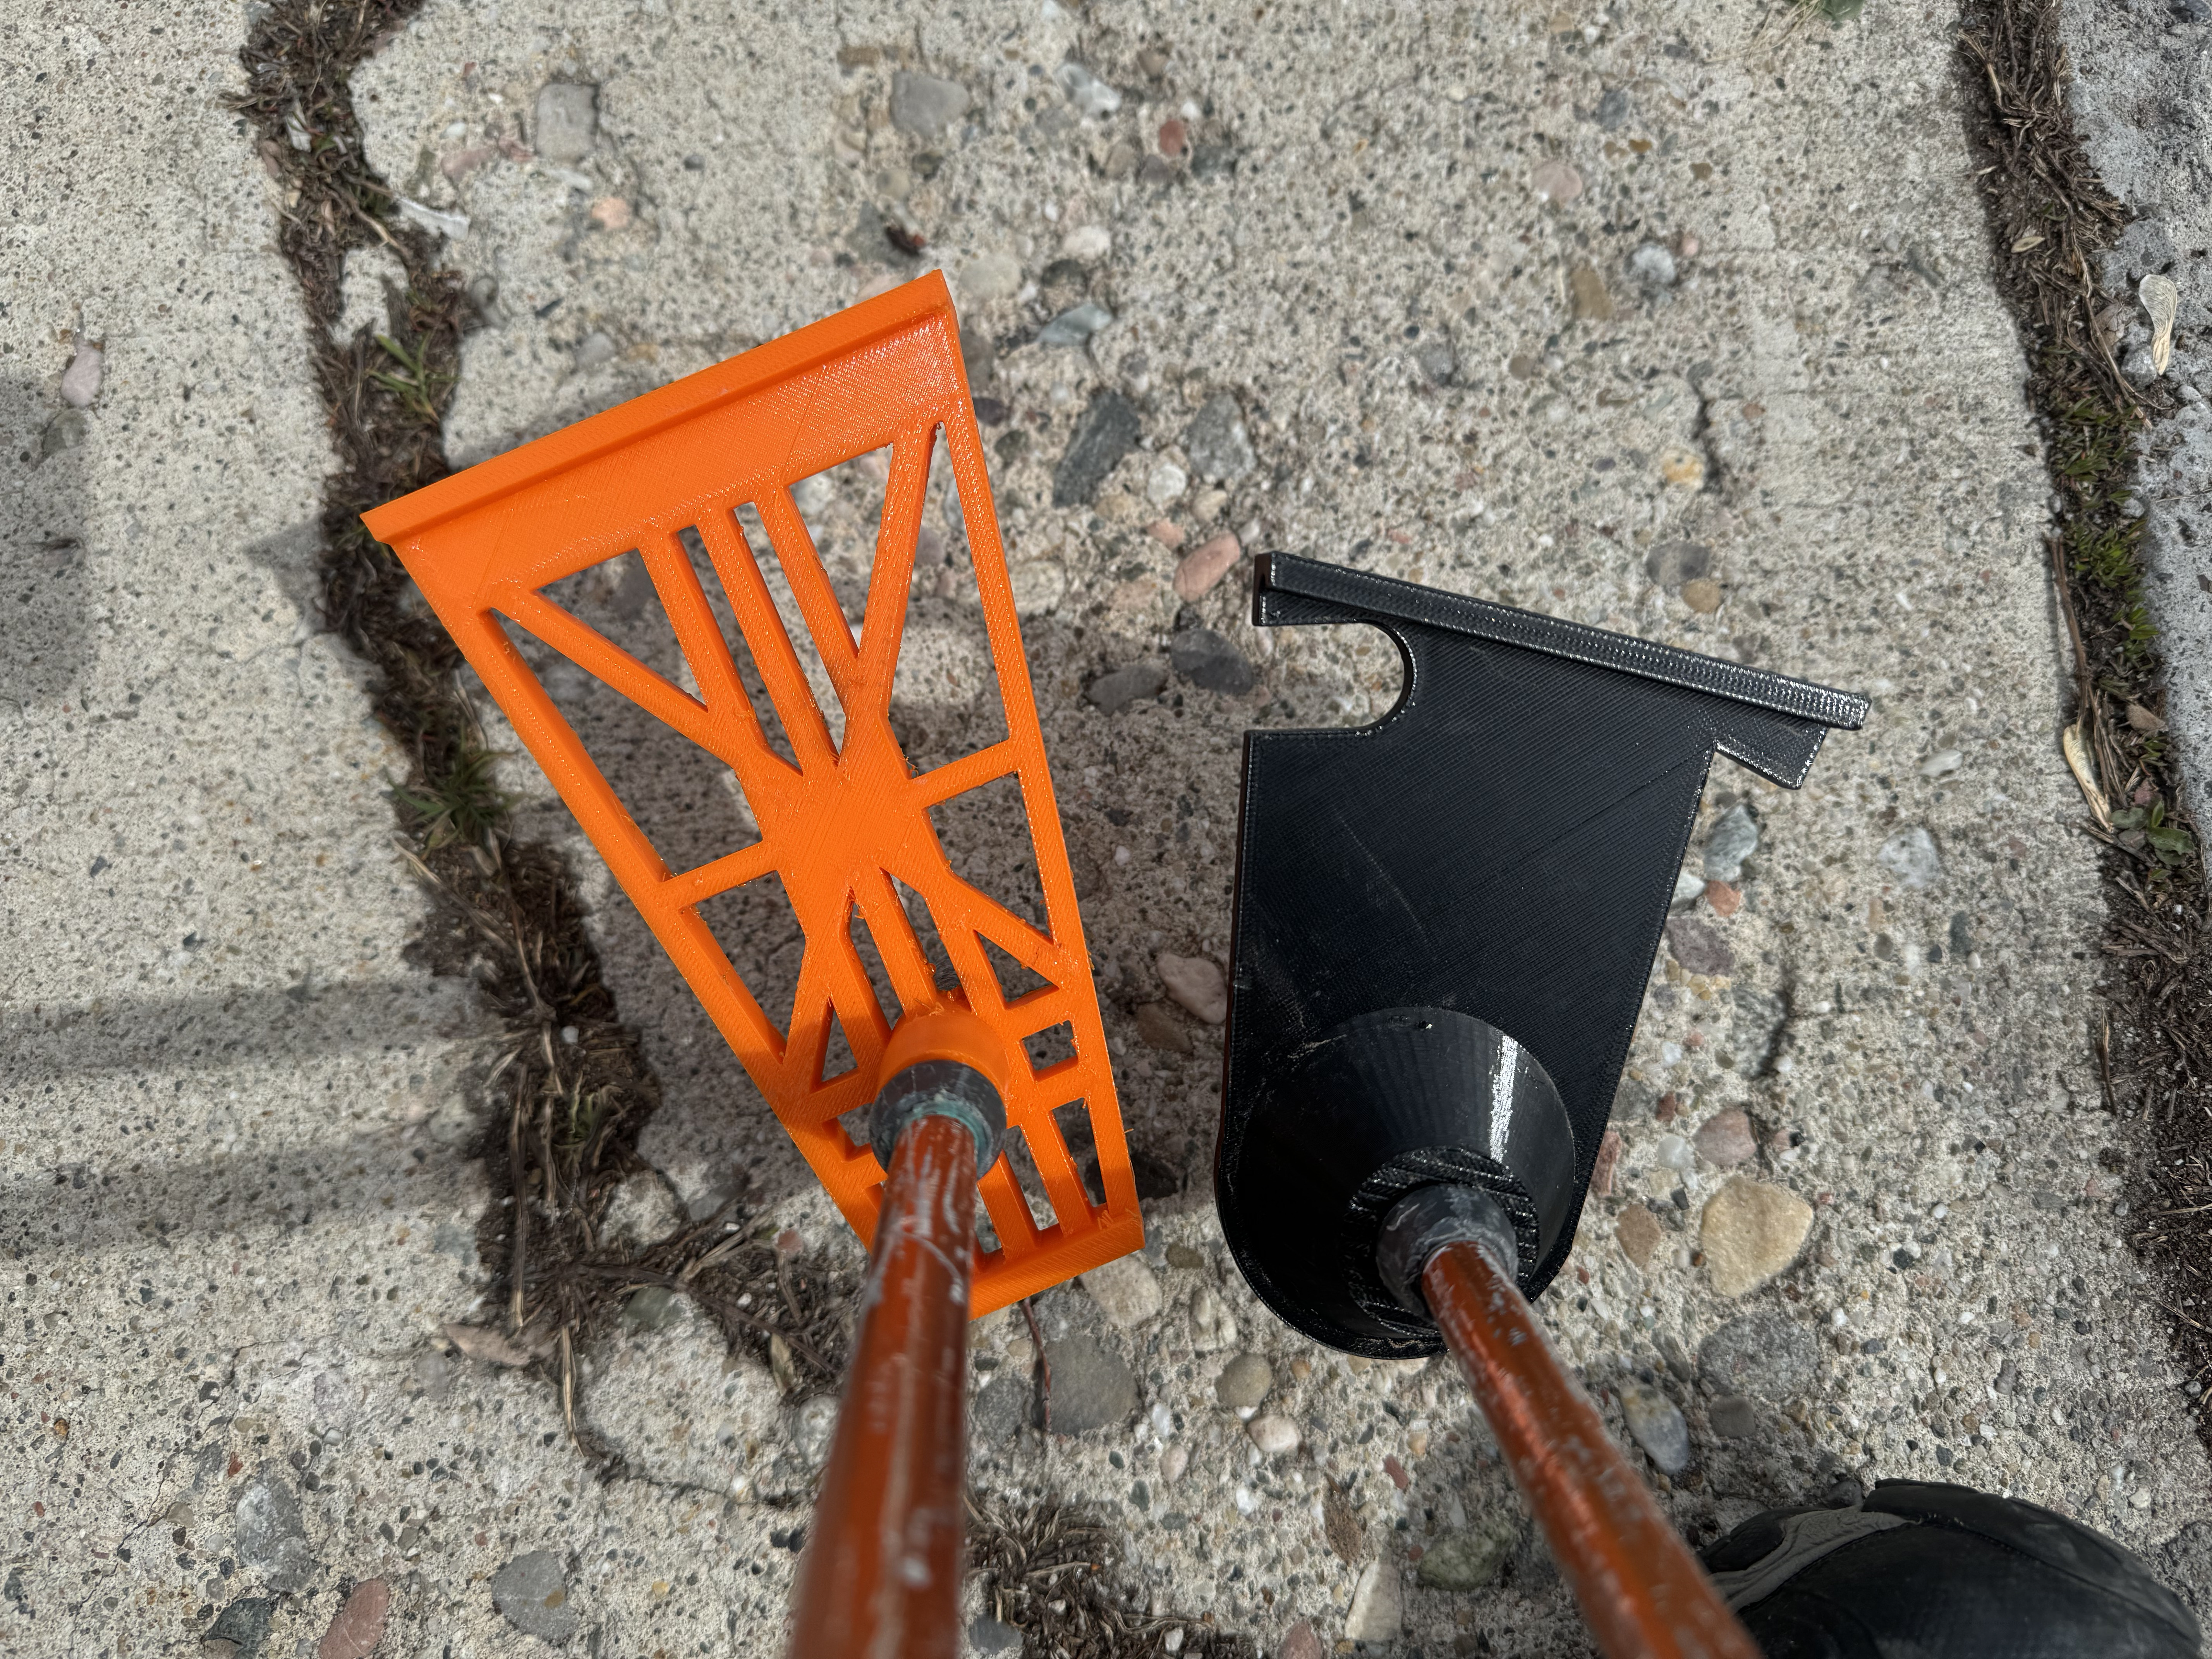
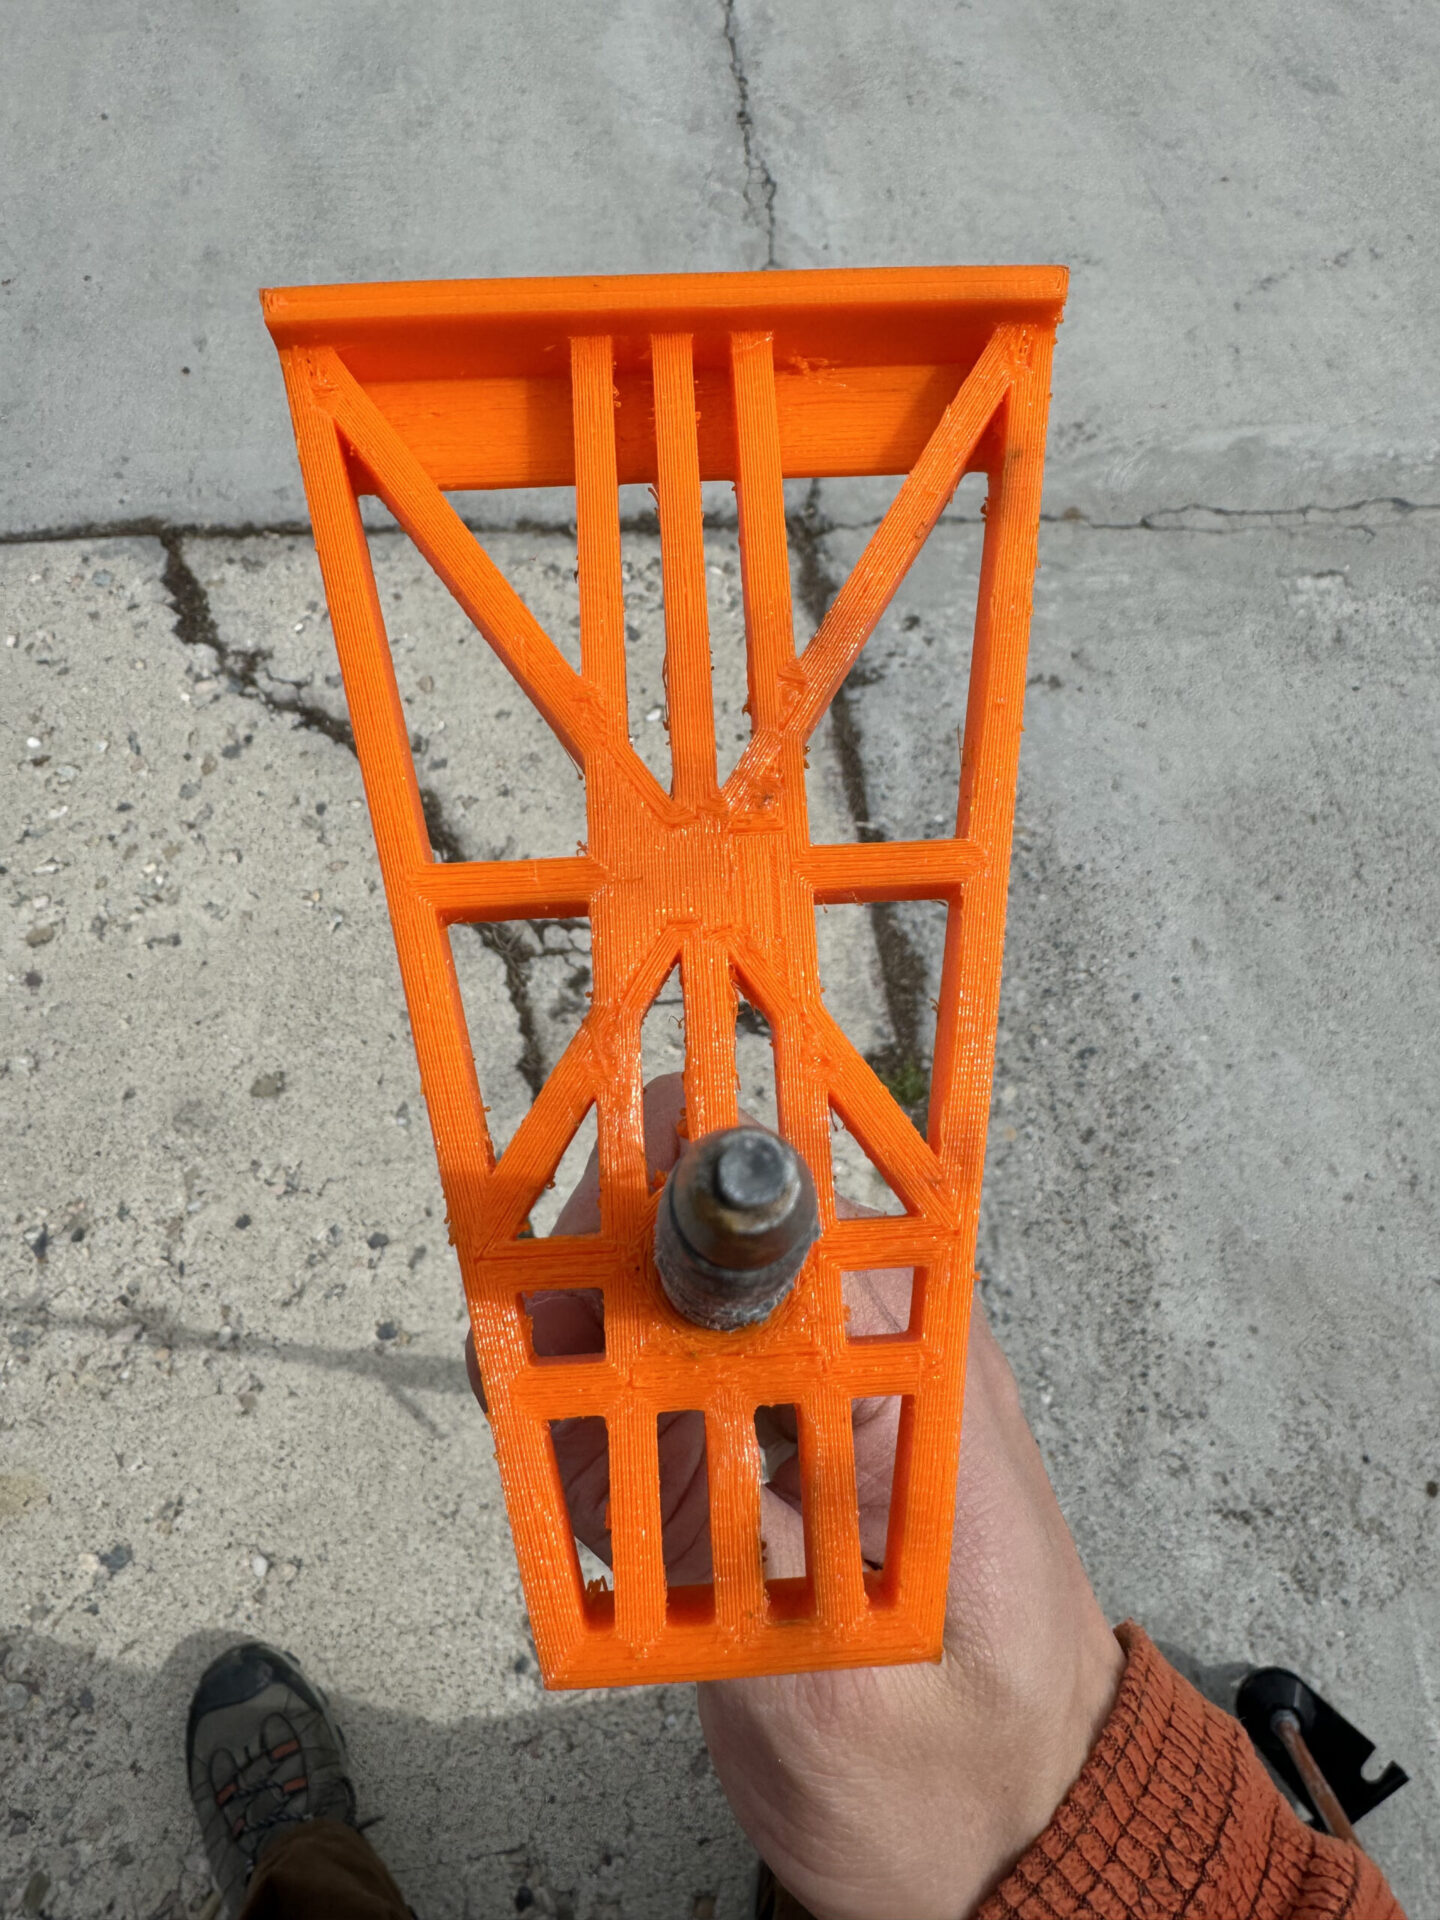
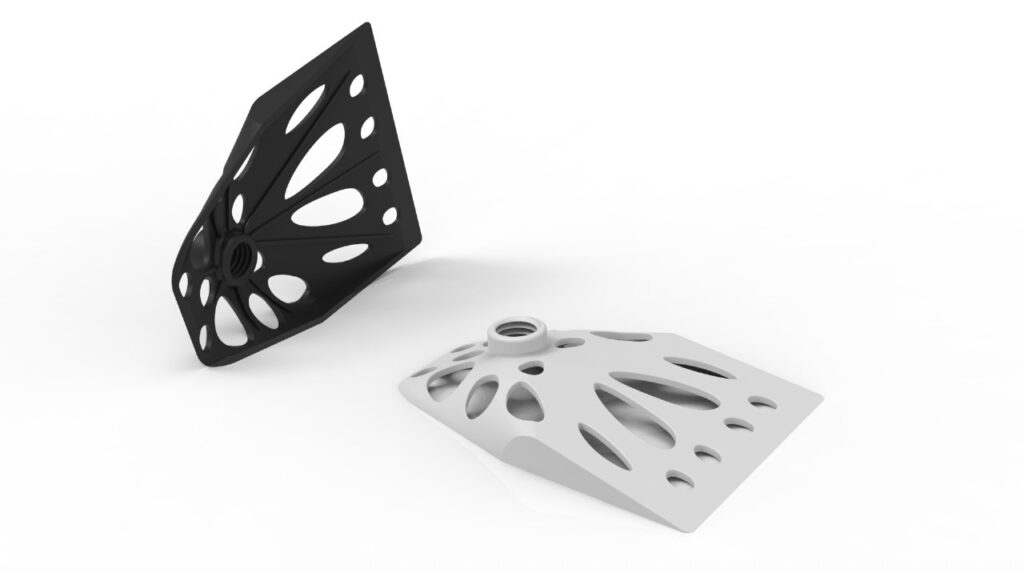
Delta Model – The Delta (pictured in my Jan 2024 post) was simply way too large; however, the triangle shape has proven to be a critical support feature that I will be using moving forward.
L’Weegie Model – This model is the best iteration so far by far. I may have gone too small but it was way more functional than the Delta Model and it looked god too! The next iterations I’ve built are based off of this model.
Hinged Model – This actually worked decently well, but with the success of the L’Weegie, I am going to shelf this idea again. It’s very hard to shift it up and down and it bends a bit too much also.
Early February Models
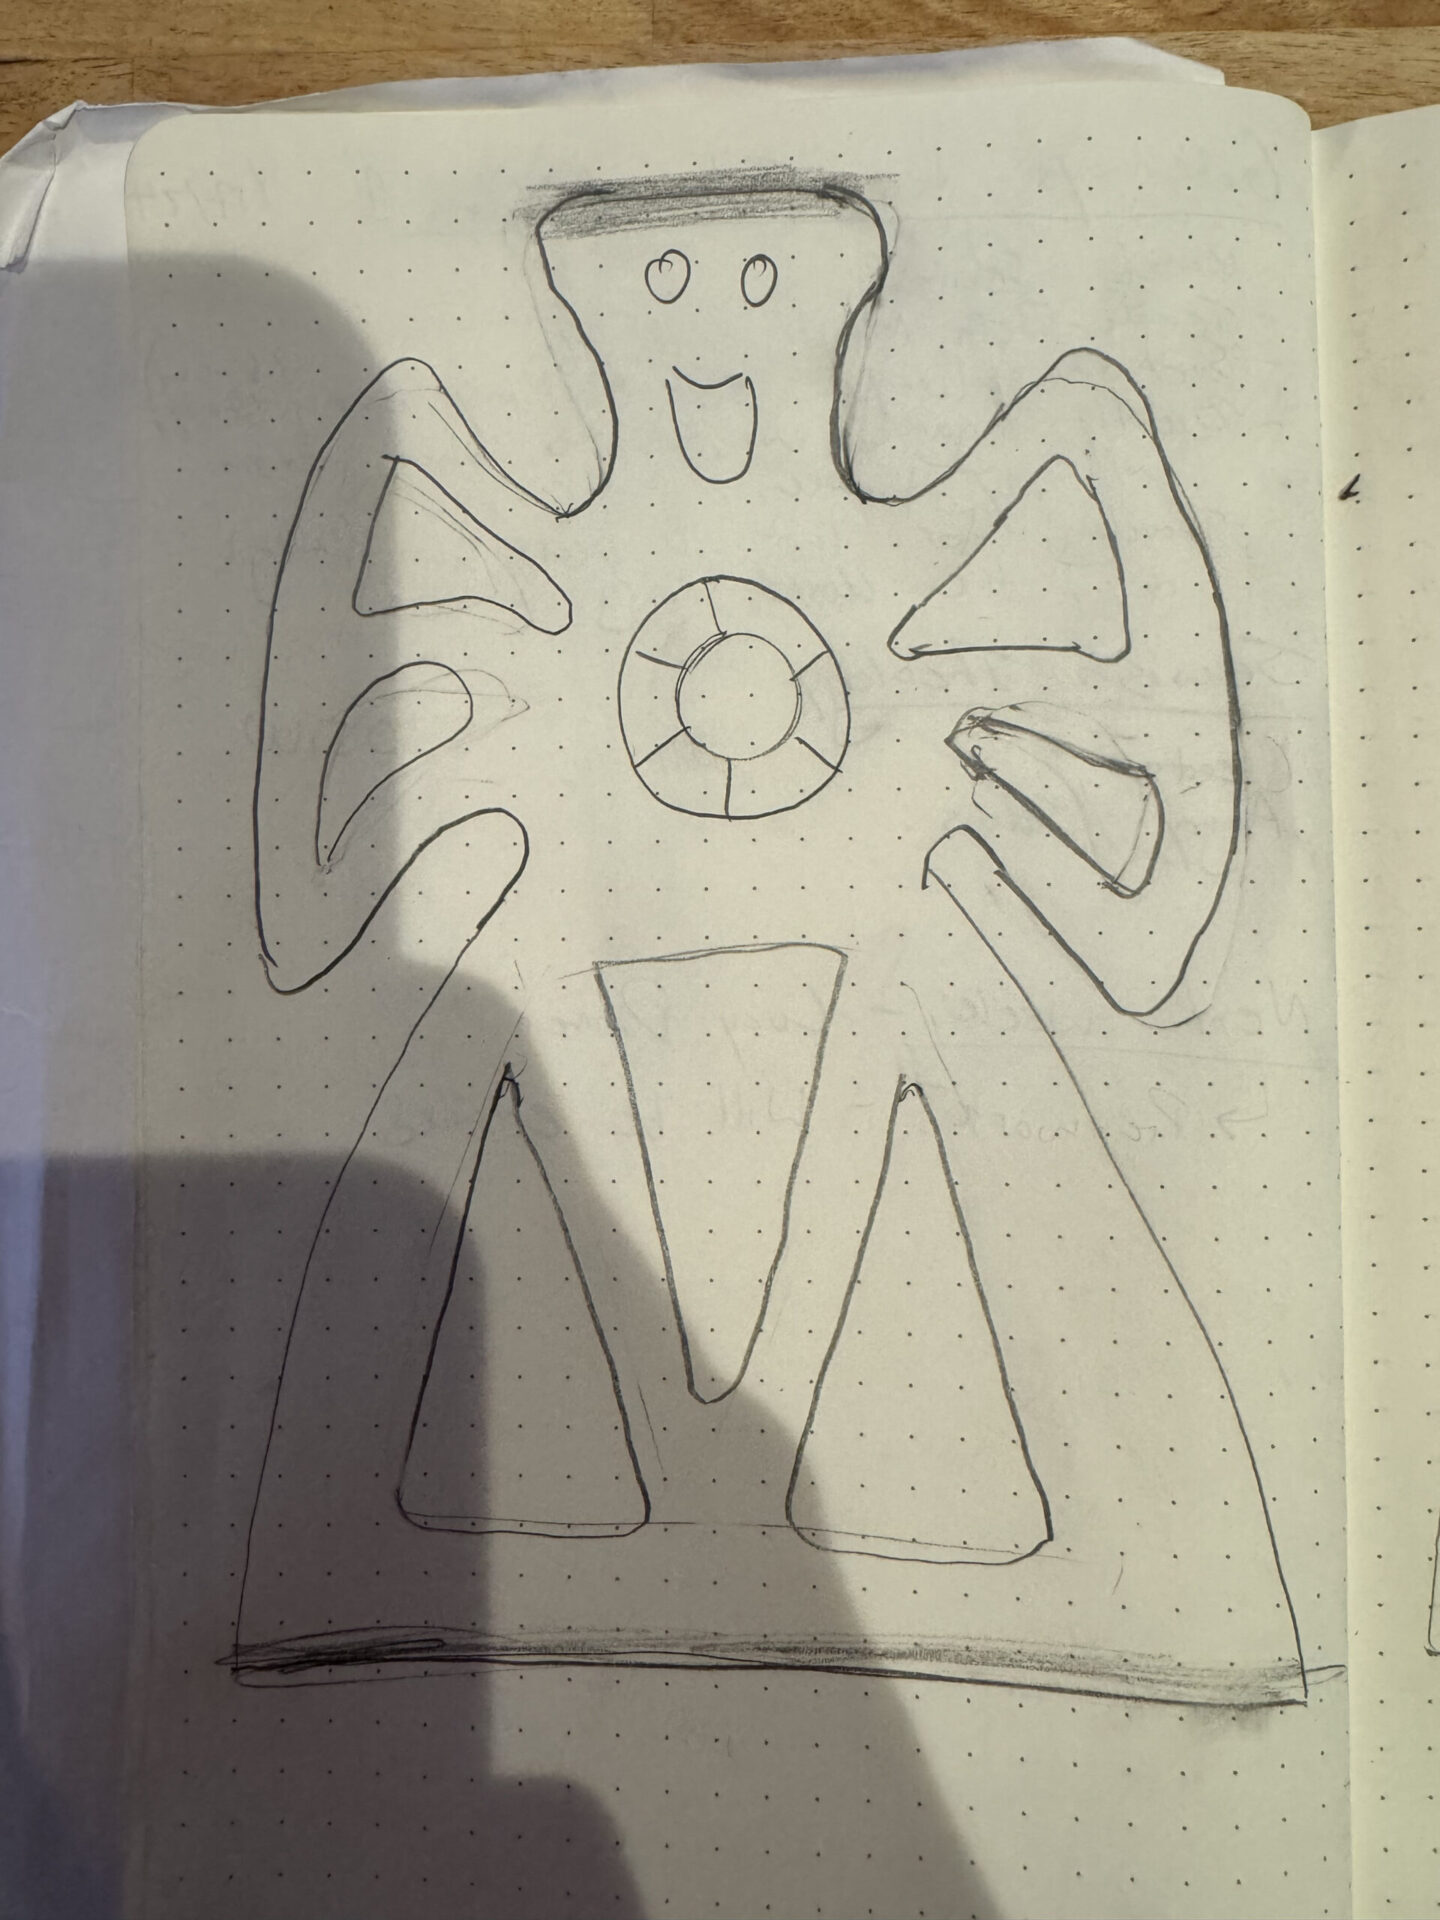
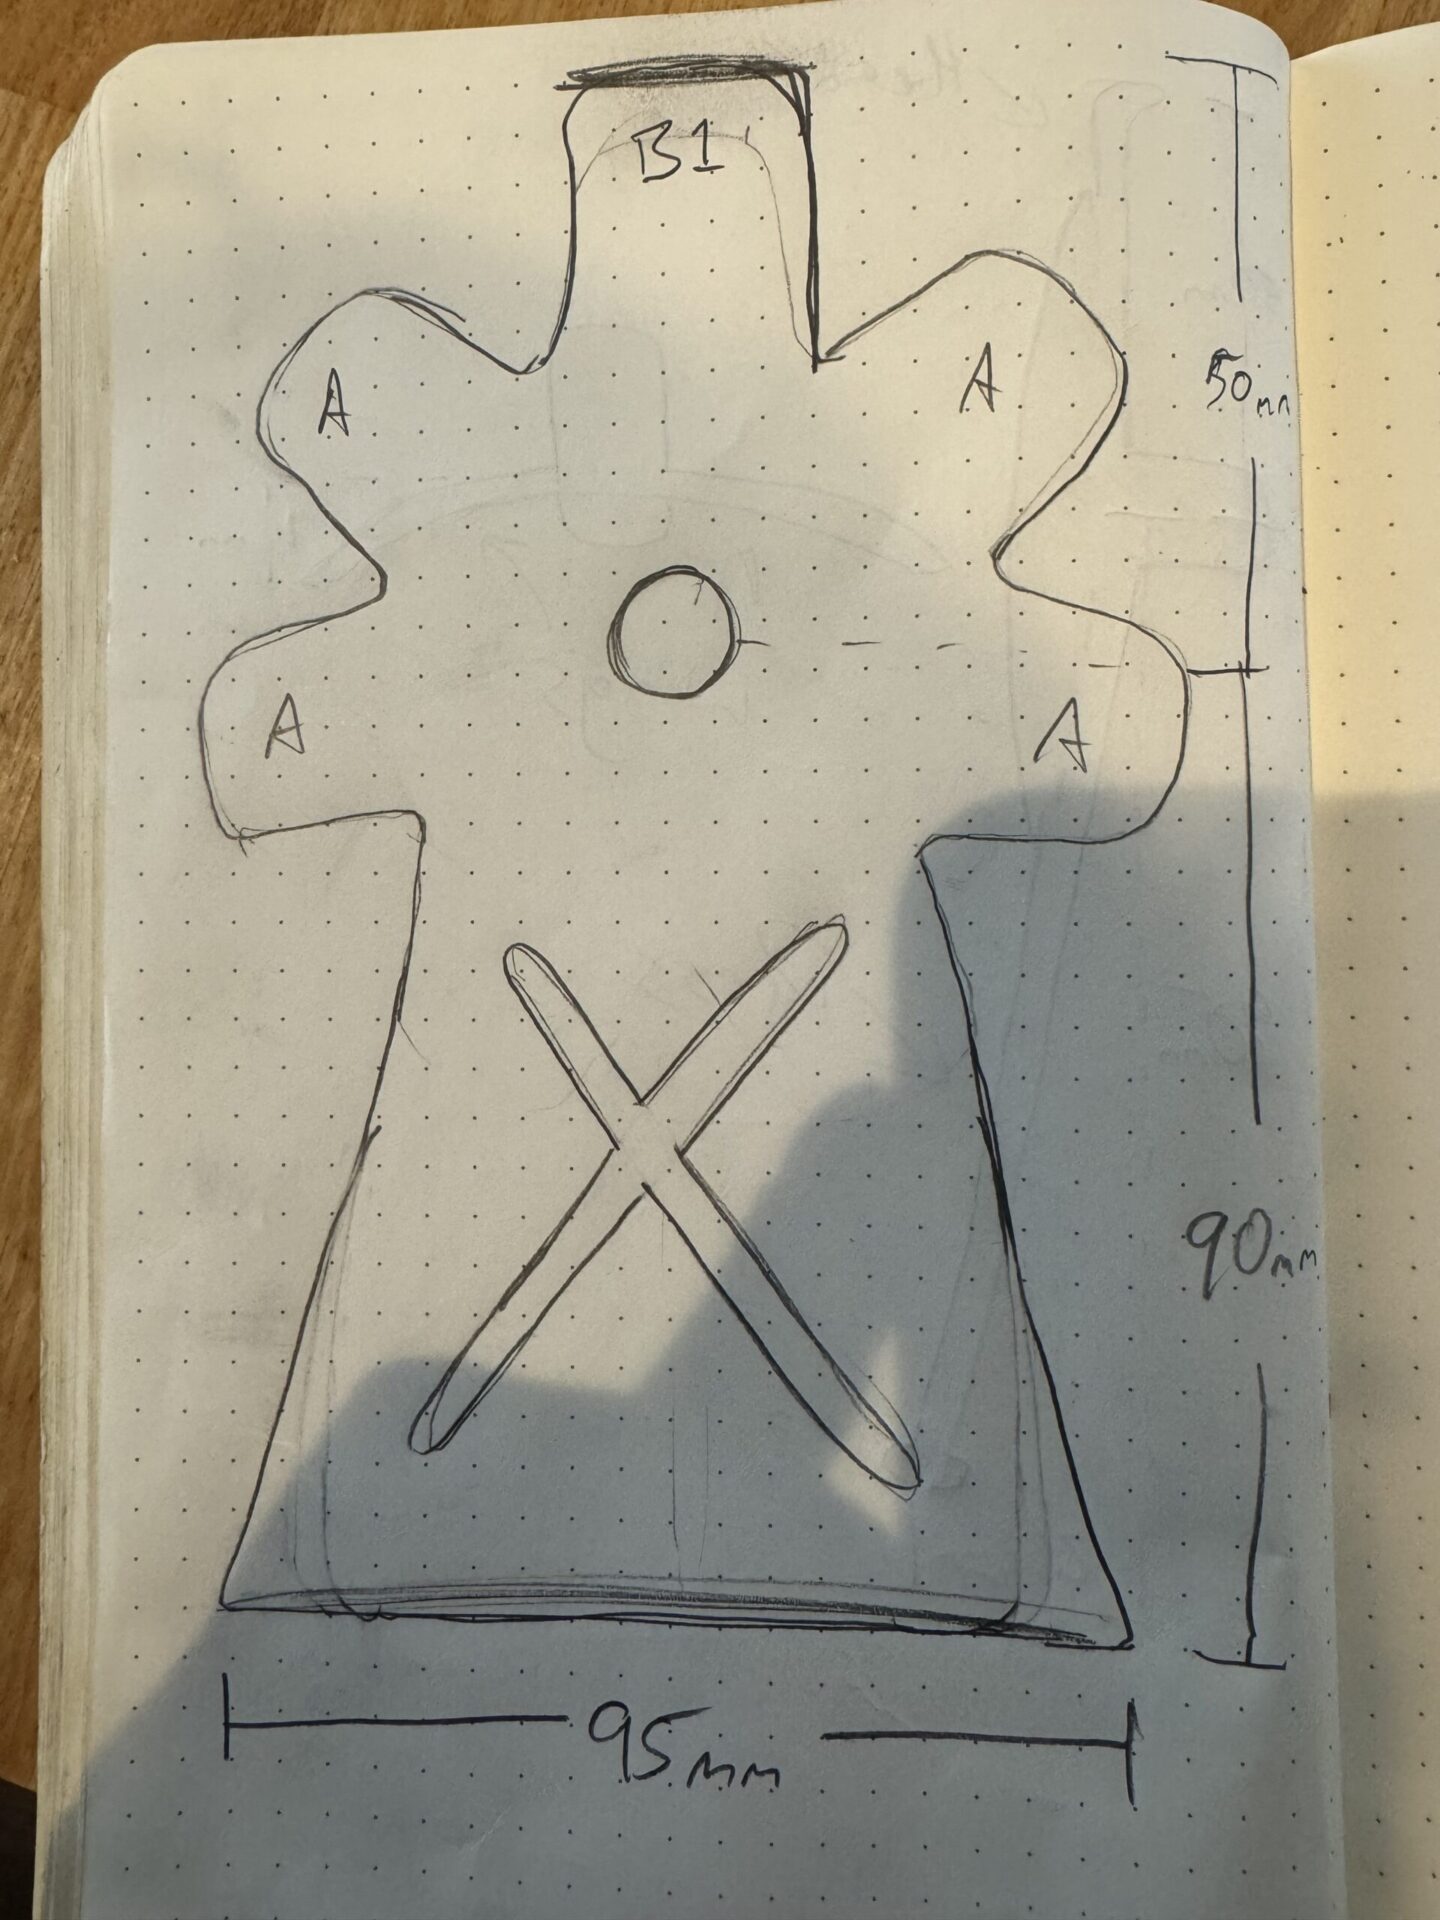
With the success of the L’Weegie, I’ve made a whole new set of Skiweegies and I’ve begun focusing on the basket element, since when I went to use the L’Weegies they didn’t have the required surface area to stay on top of the snow (doh!). The next set of designs I call the “Angel” Models and they’re pictured below.
Original Angel Model – The goal of the Angel Model is 2-fold: 1) to keep the pole from sinking into the snow and 2) to use the ‘arms’ to mess with your risers on the uphill. The arms of my initial version were too small so I went bigger, but even still they weren’t very helpful in adjusting the risers.
Second Iteration of Angel Models – The arms didn’t help with the risers much so I tried again with different shaped arms.. which again didn’t work much for the risers but did keep the pole from sinking. I also tried making them Left / Right specific but that was a bit too cumbersome and kinda confusing.
… The Angel Models were my best yet but they were quickly outshined by a simpler ‘Round’ iteration…
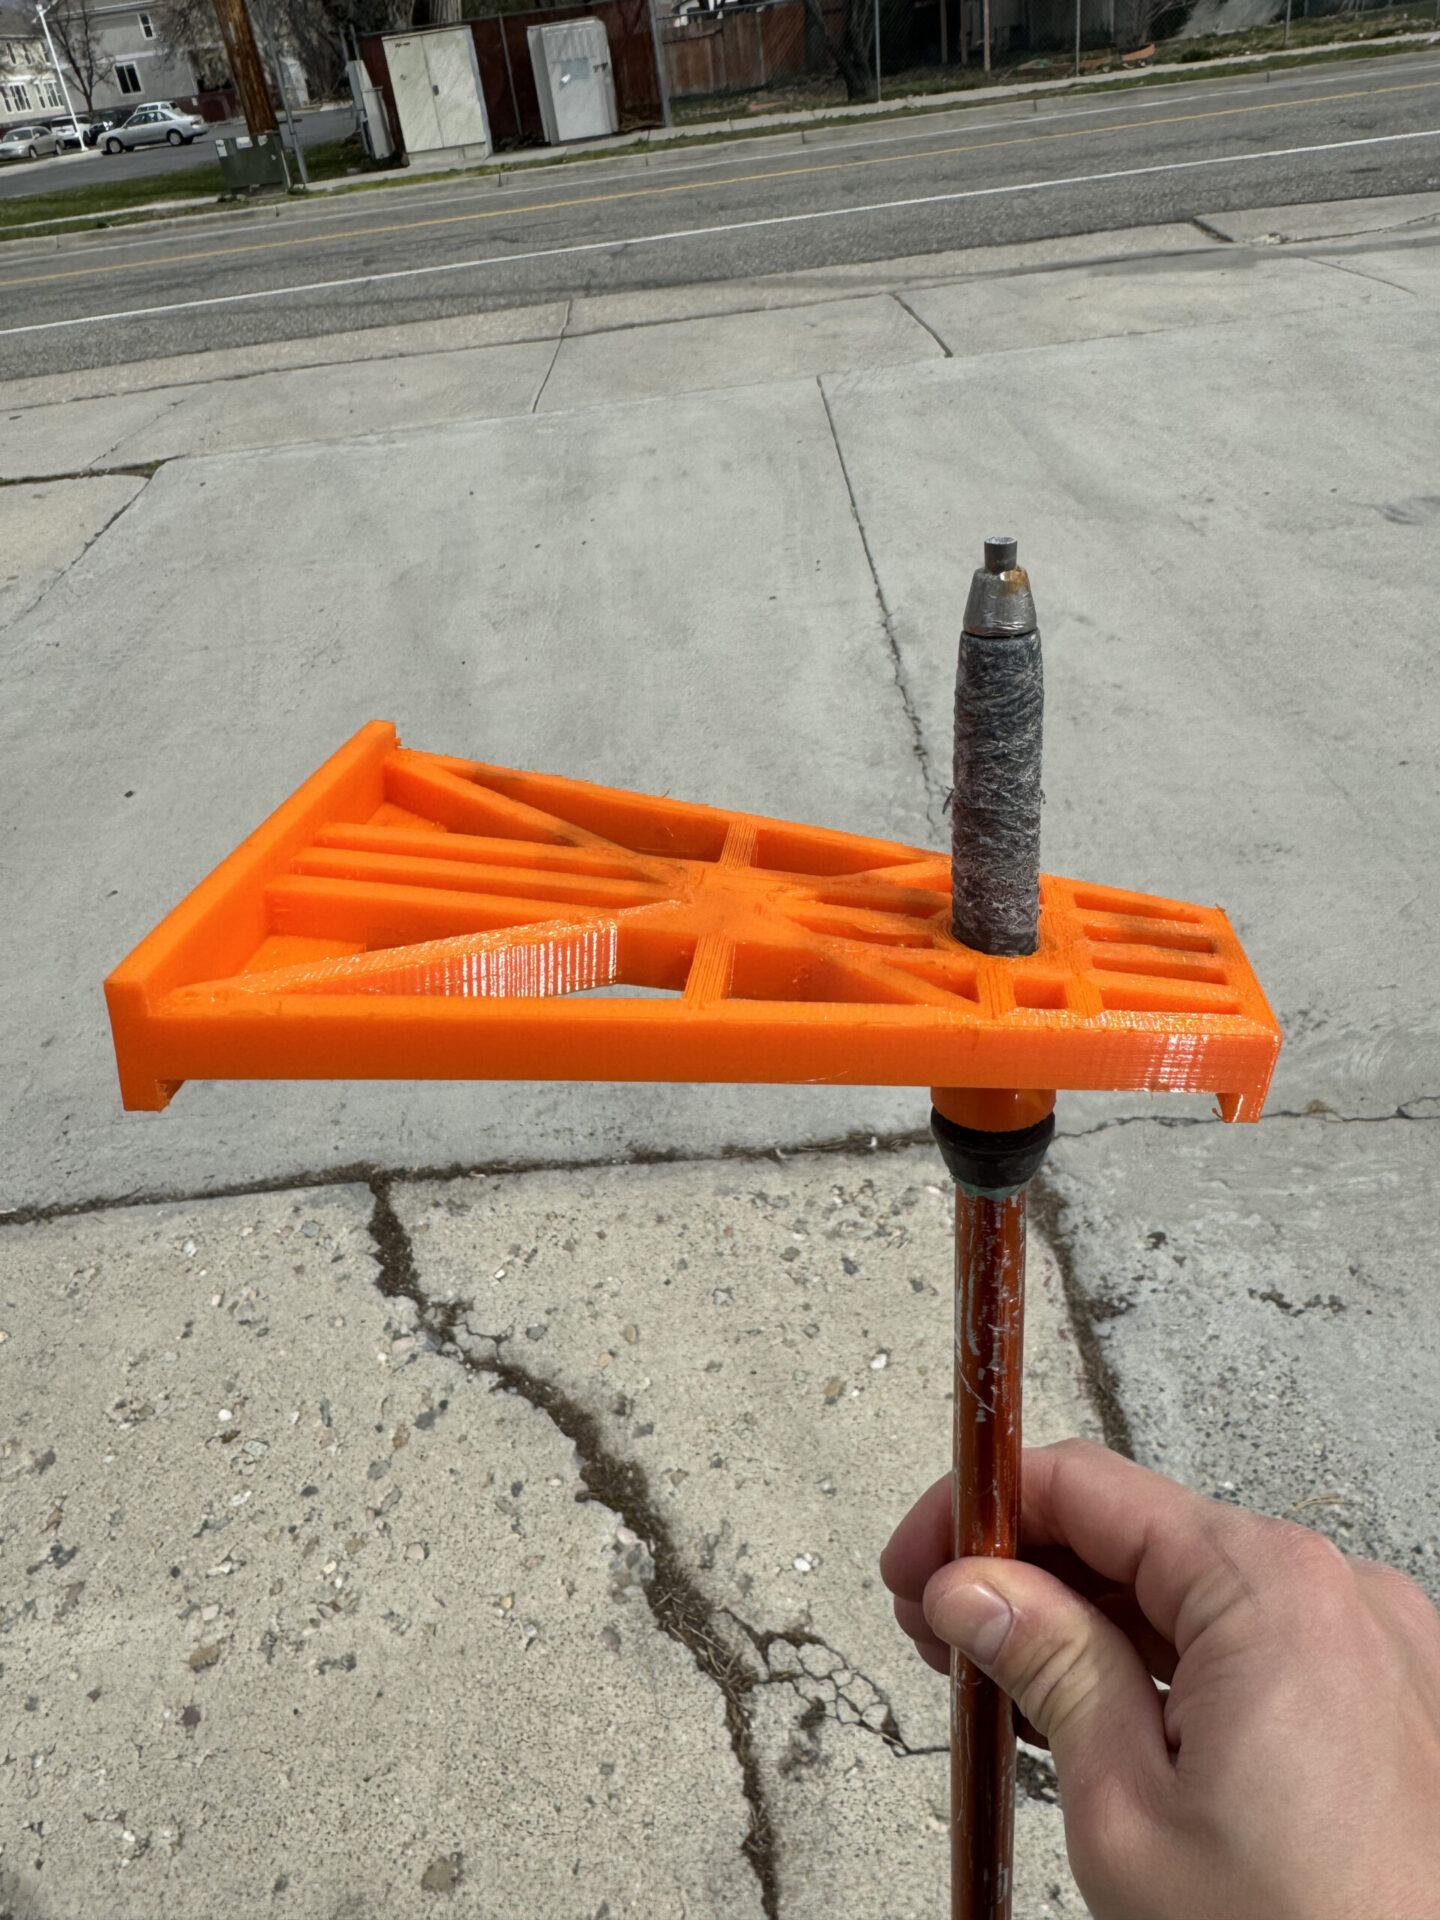
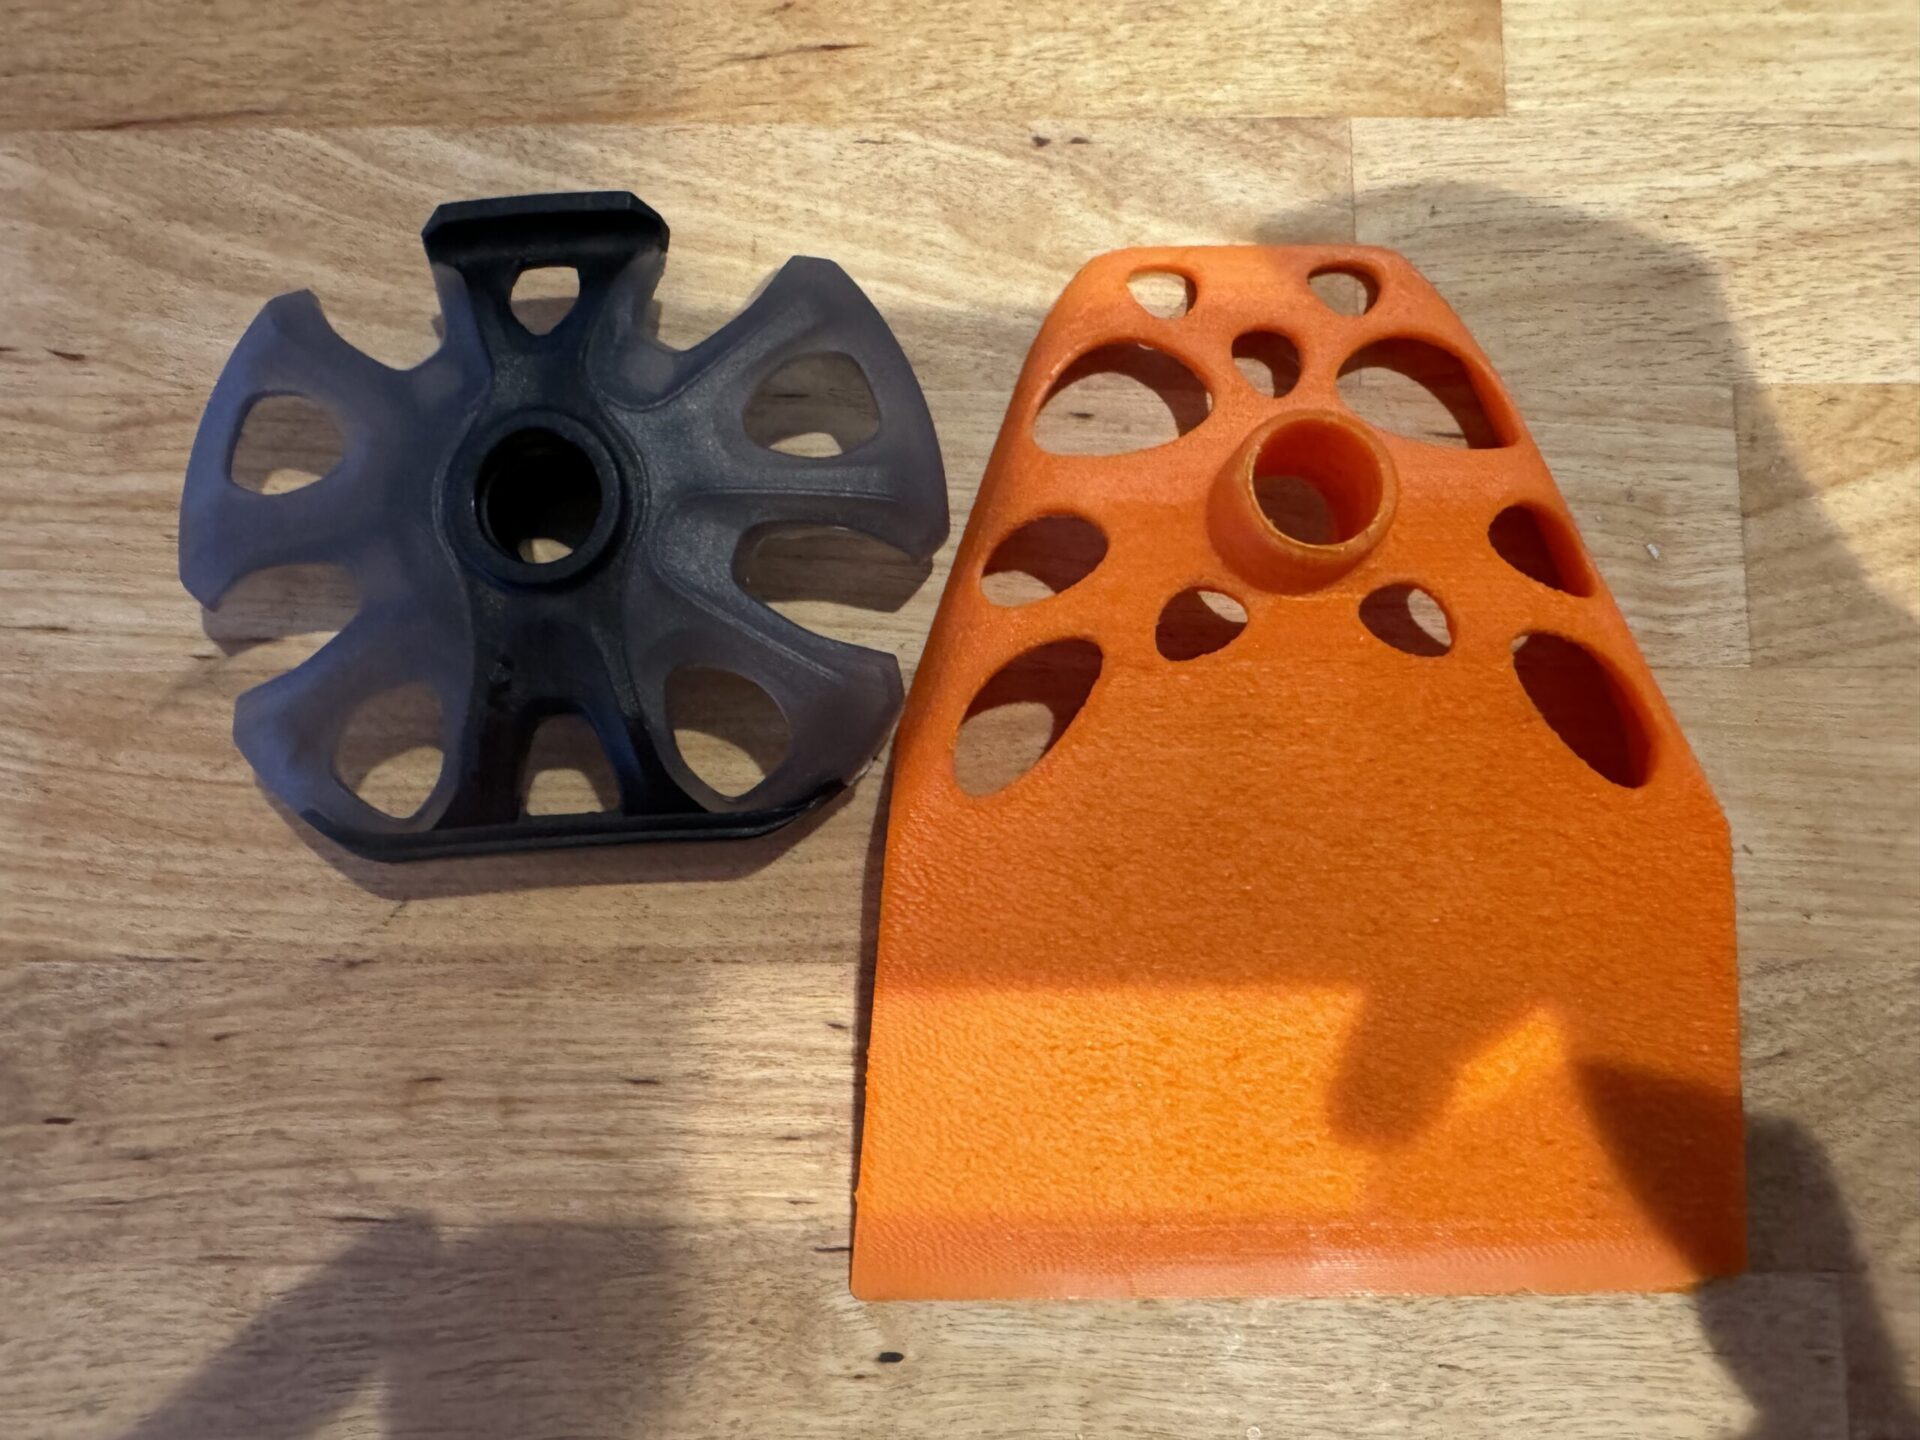
Round Model – The round model pictured below I threw together pretty quick but I ended up loving the feel and balance of it — it worked very well and didn’t get caught on anything. The ‘annoying’ factor of this model was an all-time low and this will be the basis of future models.
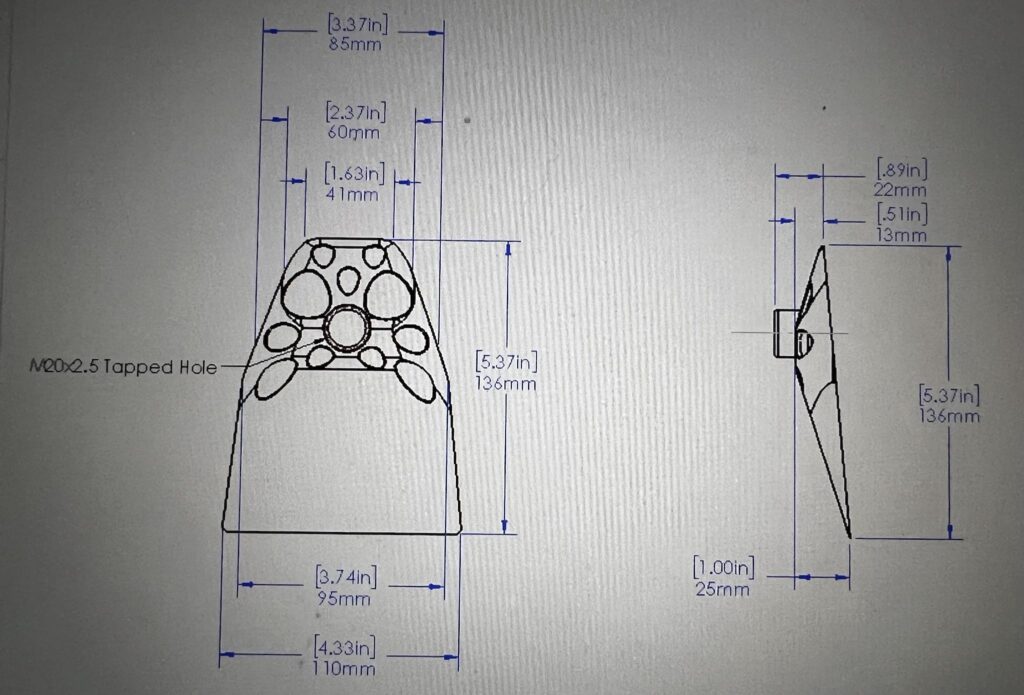
Coming soon – I have modeled a few more prototypes and I’ll be able to test them next month. The general concept is to make baskets that are closer to the Round model (or closer to a conventional basket) with the plow sticking out and the support of the Delta model. I included some screenshots of my future models below.
In the future models I am also adding a feature on the side of the scraper that I am hoping resolves the ‘riser adjustment’ issue.


January 2024 Delta Model, hinges, and other future designs
The TX model was very functional and could be used in the backcountry, but in testing on resort I was a bit bothered by a few design flaws:
1) The plow shape was liable to catch on something (like a branch or the ropes in the lift line)
2) Sometimes when planting during a turn, catwalk, or lift line, I’d get all basket (didn’t get the pokey part of my ski into the snow), causing me to slip
3) The product is not durable enough for the pounding resort skiing can deliver, including poling across traverses (this can be partially solved with technique)
Overall, I think the Model TX is a sufficiently good backcountry basket but it is too cumbersome for resort. I have ideated some potential solutions:
Skiweegie Delta (sent to print) – This (very good looking) model could solve problem #1 above, making it a better backcountry basket, but still not ideal in resort due to problem #2. Problem #3 (durability) also lingers.
‘Wee’-G or Lil’weegie (future prototype)– I’m planning a smaller version of the Skiweegie Delta that might be less tolerable as a ski scraper (too small) but more tolerable as a ski basket (less big). This could resolve all 3 problems above but decrease the product’s effectiveness as a ski scraper.
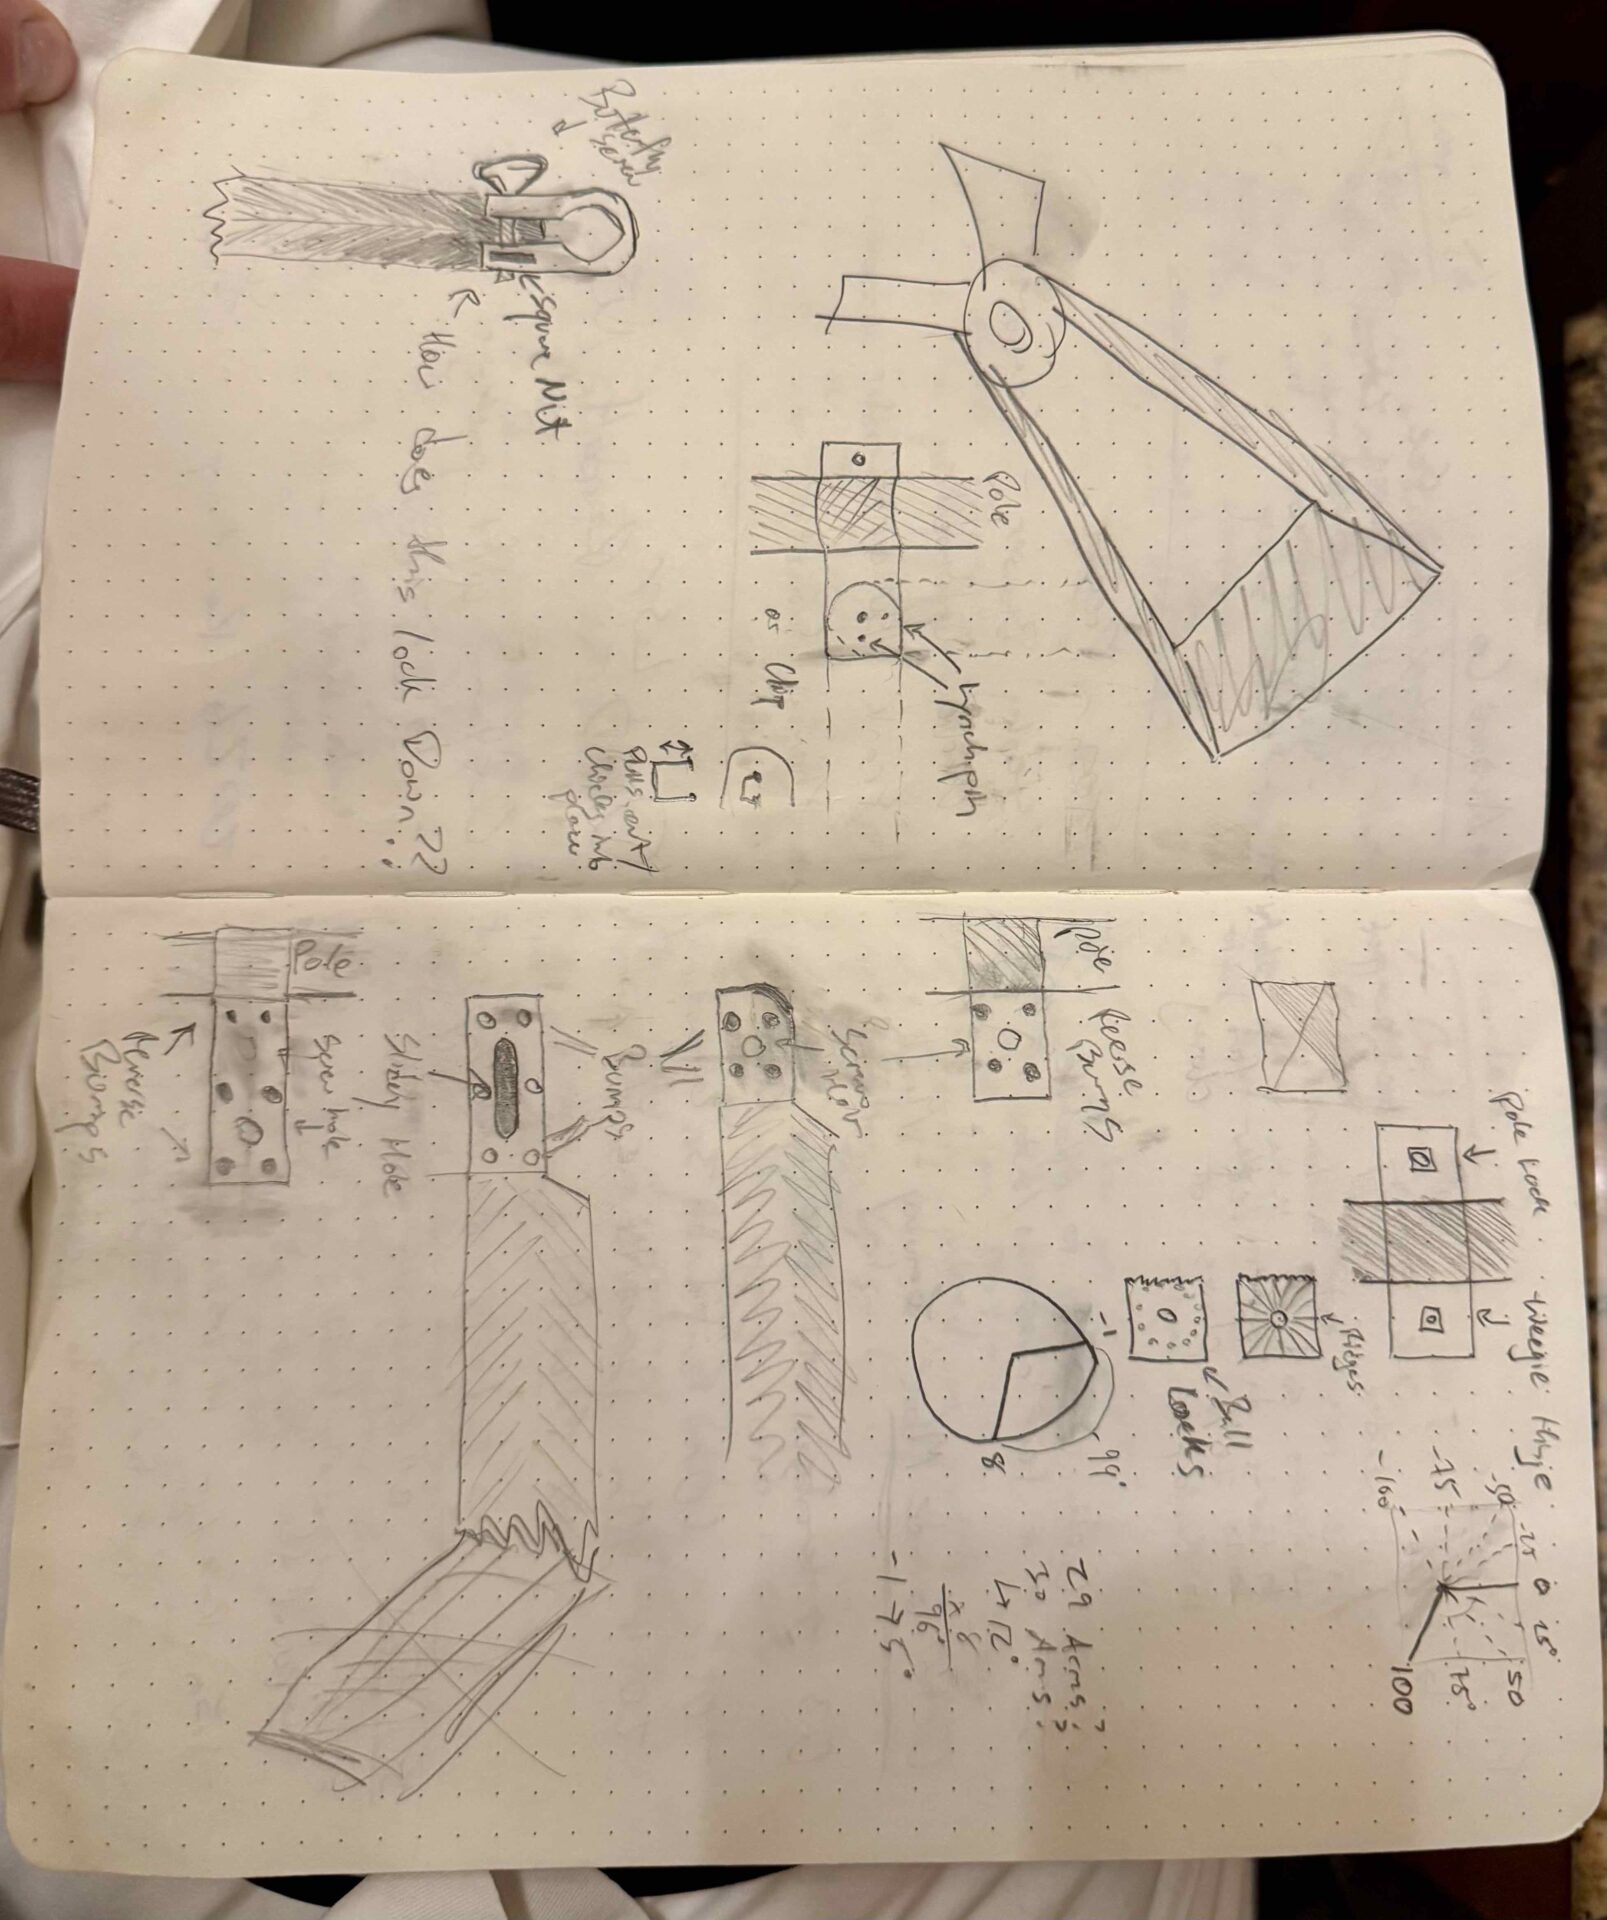
Hinged Skiweegie (sent to print) – A solution to all 3 problems without reducing effectiveness could be to create a hinge to allow the skiweegie to flip up/down for uphill / downhill mode. This model will be supplementary to a basket, not a replacement.
I was trying to avoid the hinge but it might be my best bet. The 3D rendering, nor my attempted description does this model justice, so you’ll have to check the next update for what it looks like.

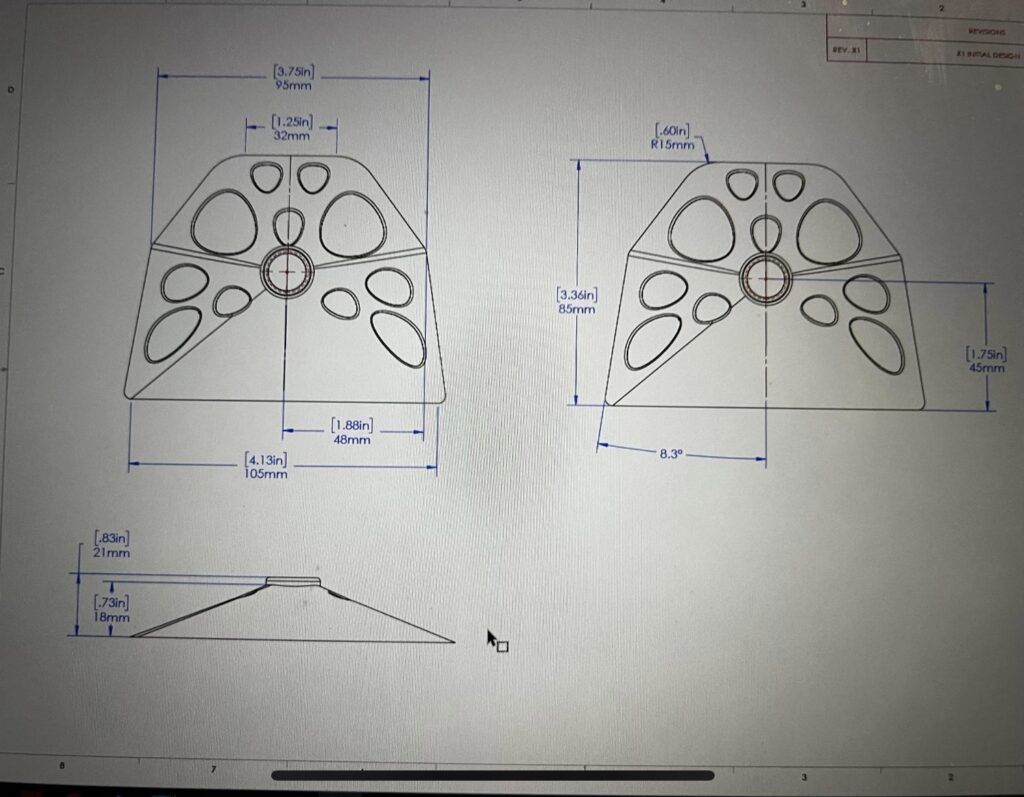
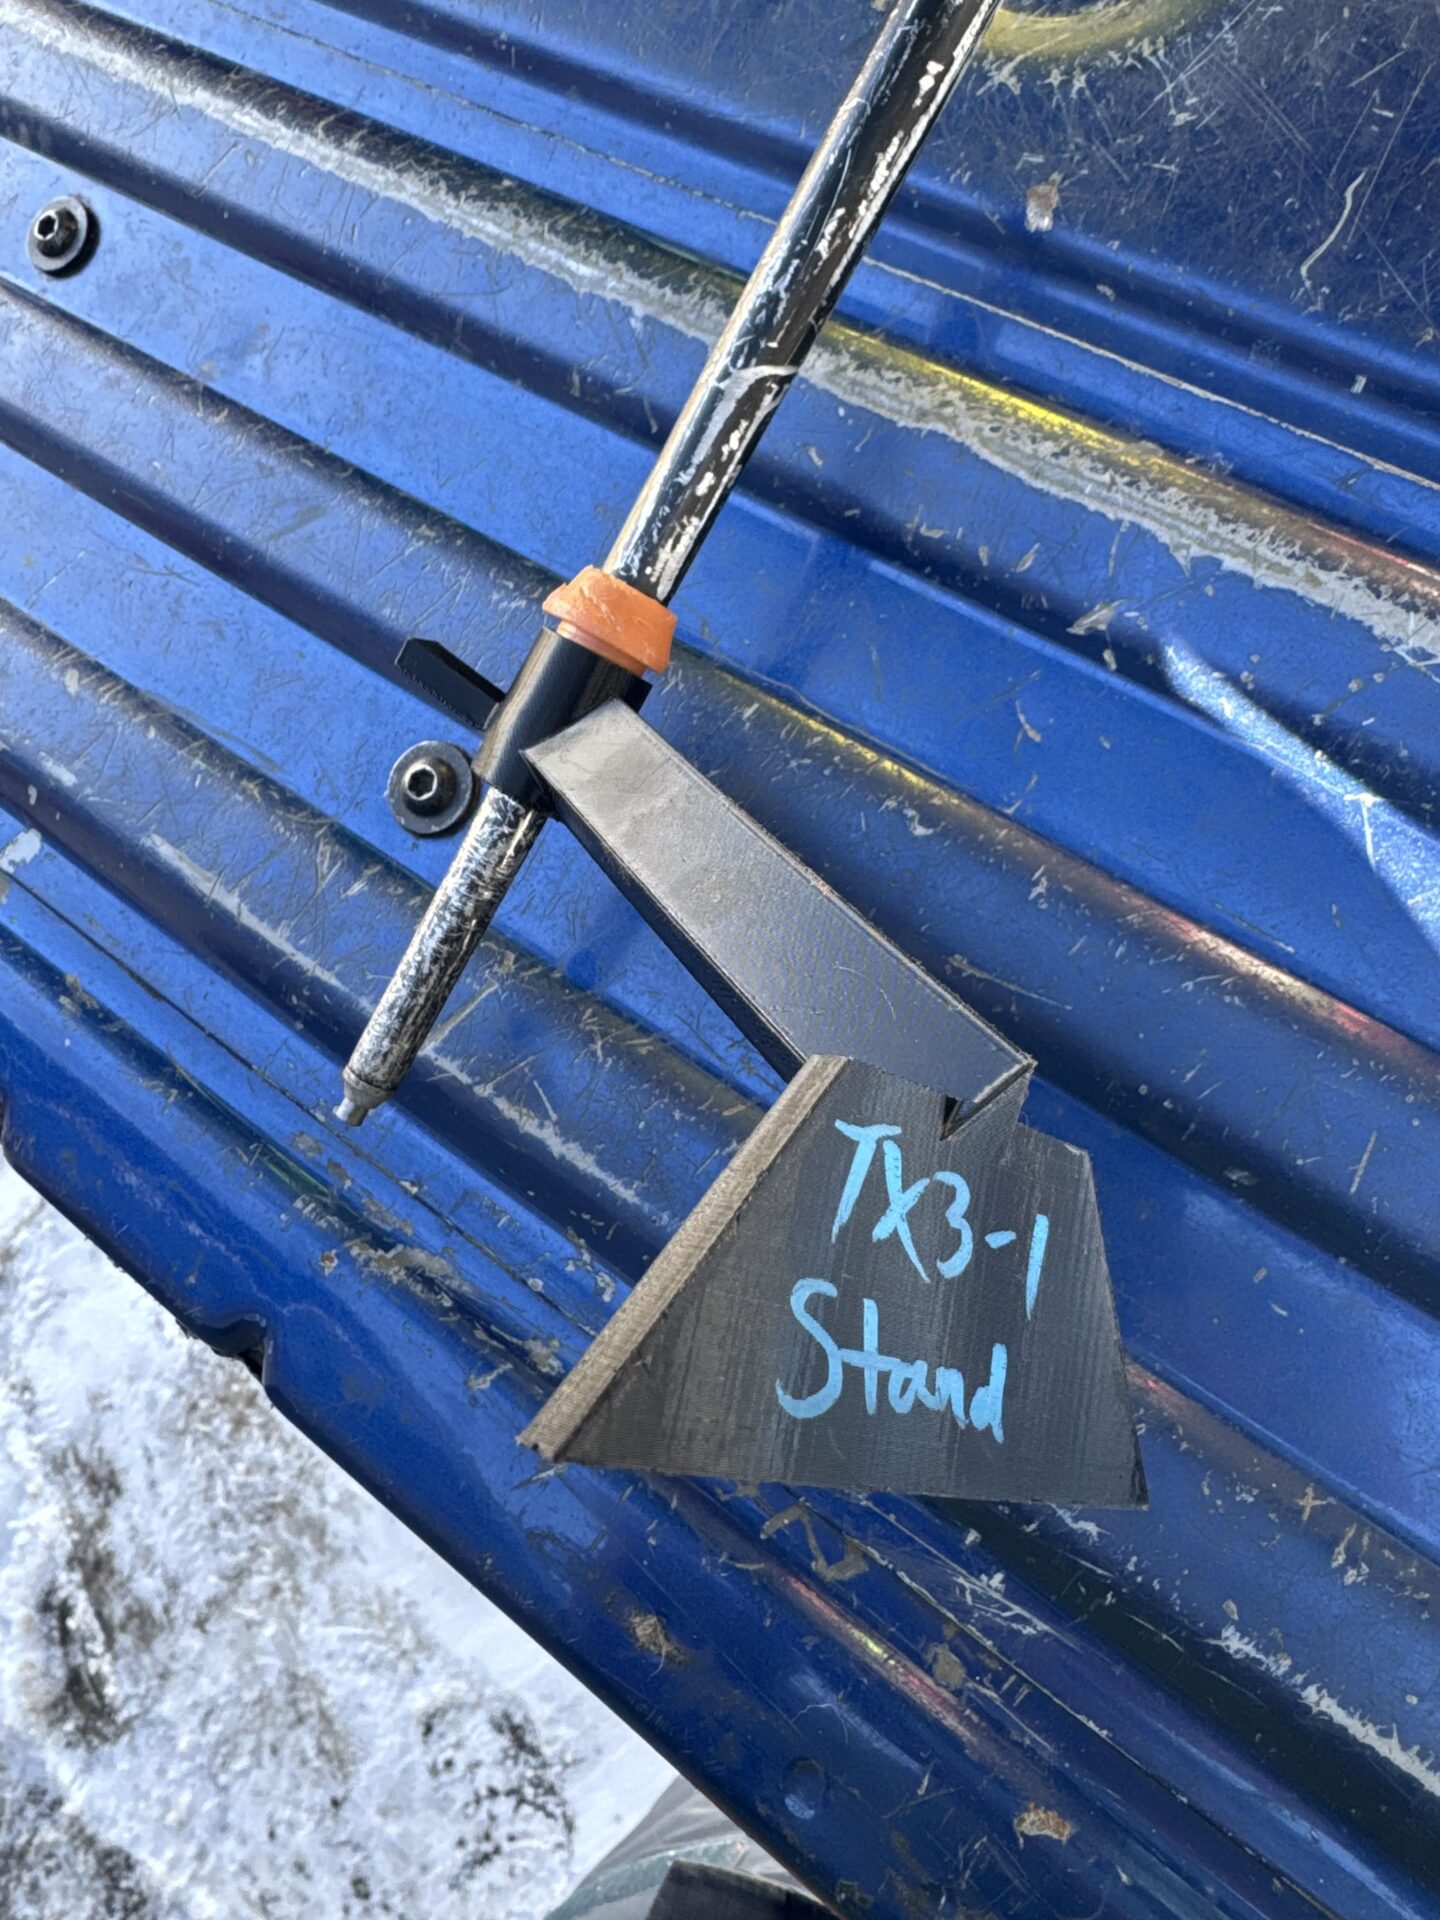
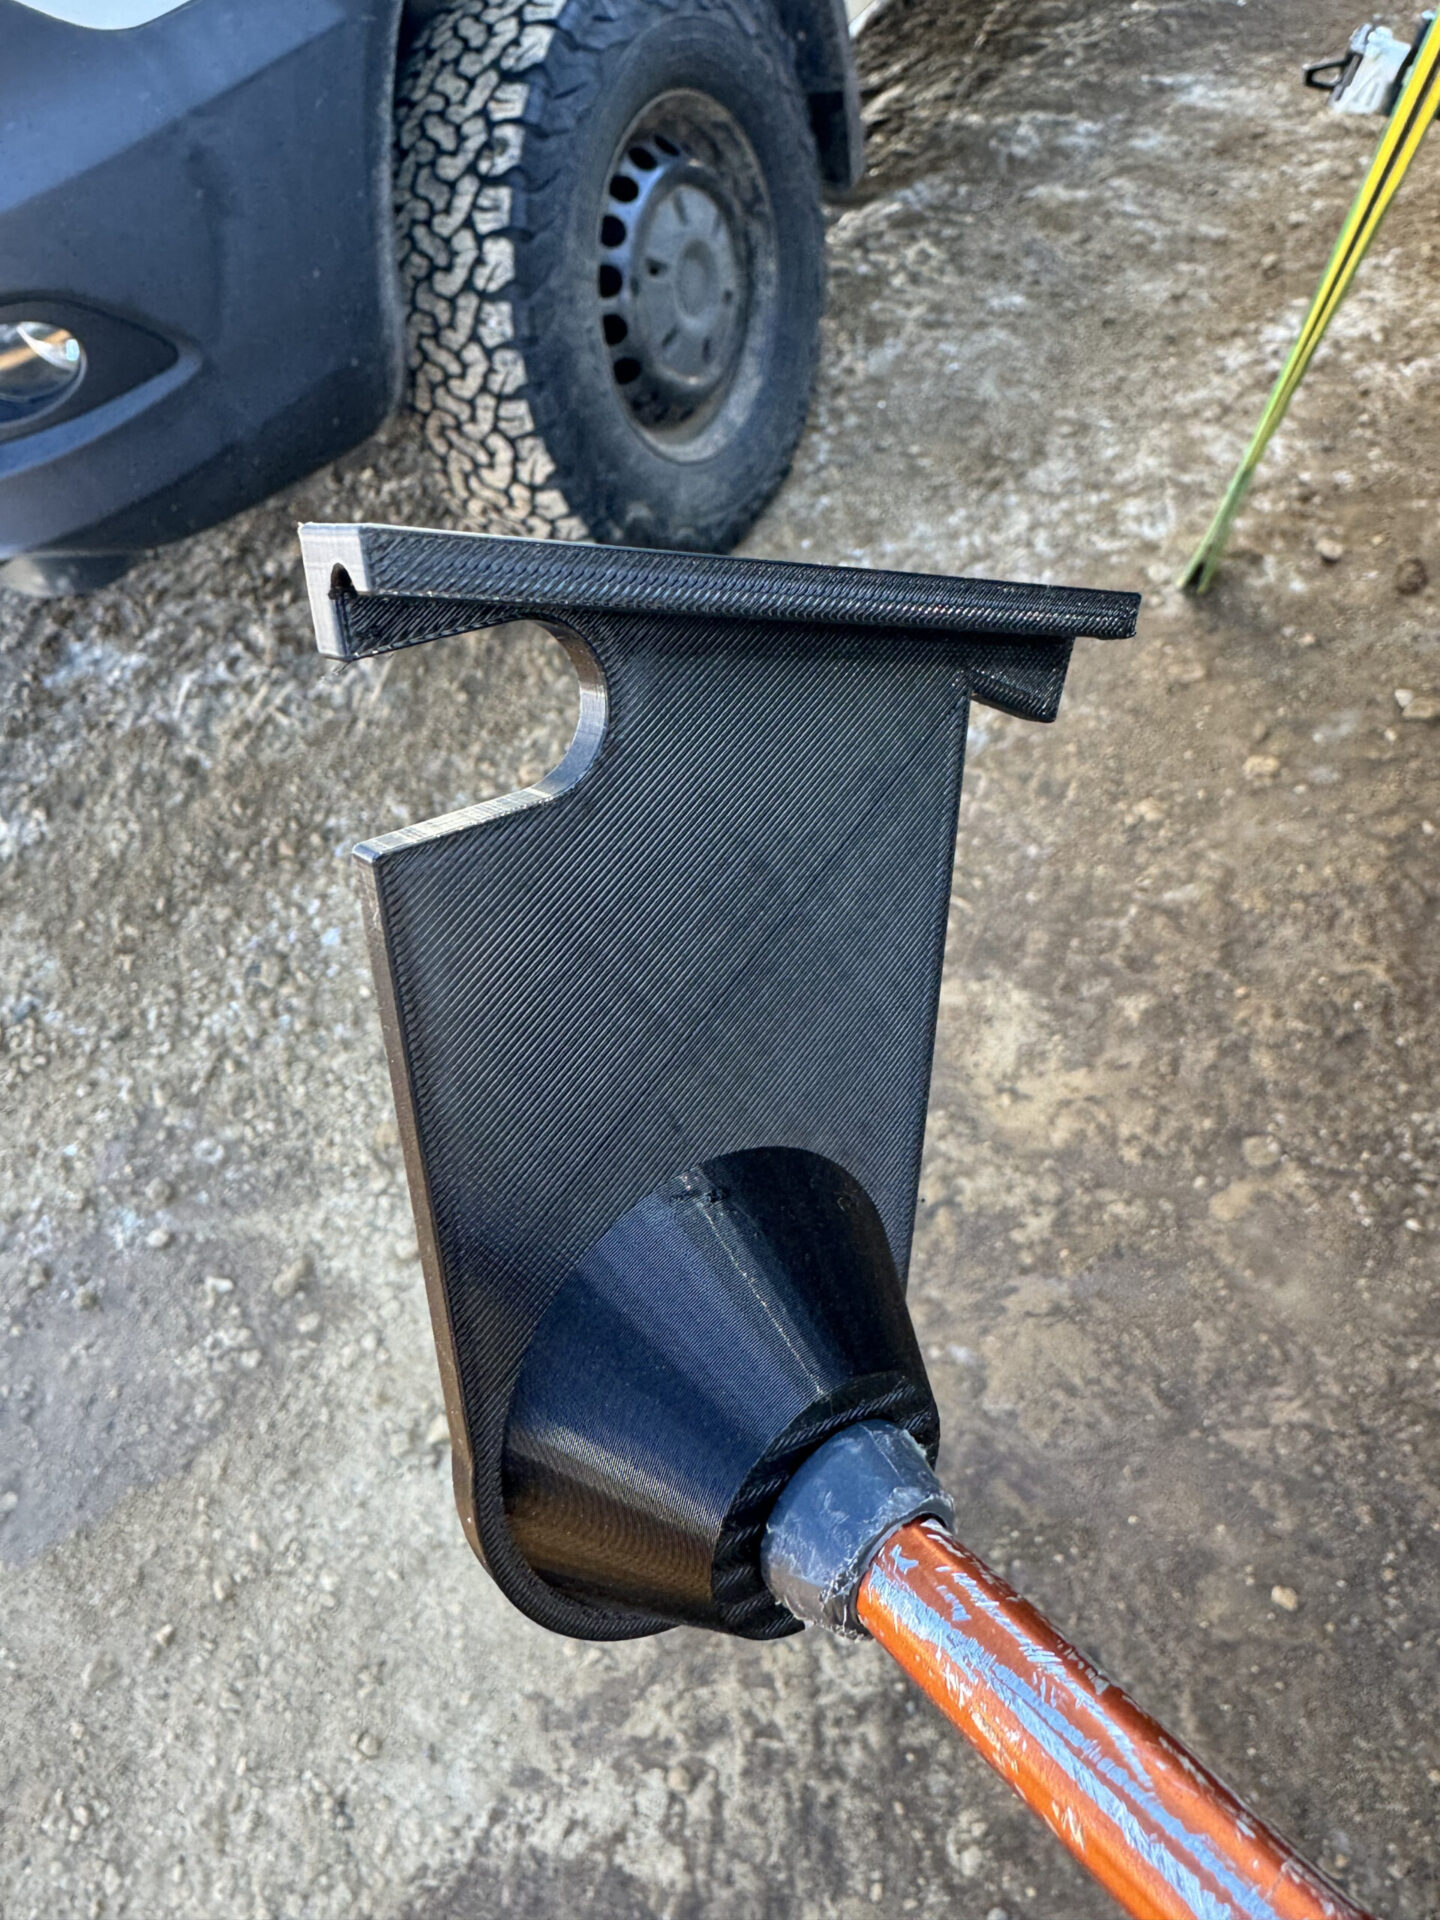
October 2024 Model TX
With the success of the T-Bar with the V-shaped tail, I created the Model TX, which is that same basket with a few adjustments:
1) New material that I hope won’t break
2) Various new printing settings that I hope will make it not break
3) Adjustments to shovel, scraper, and tail dimensions
I printed 10 to test / give out as demos.


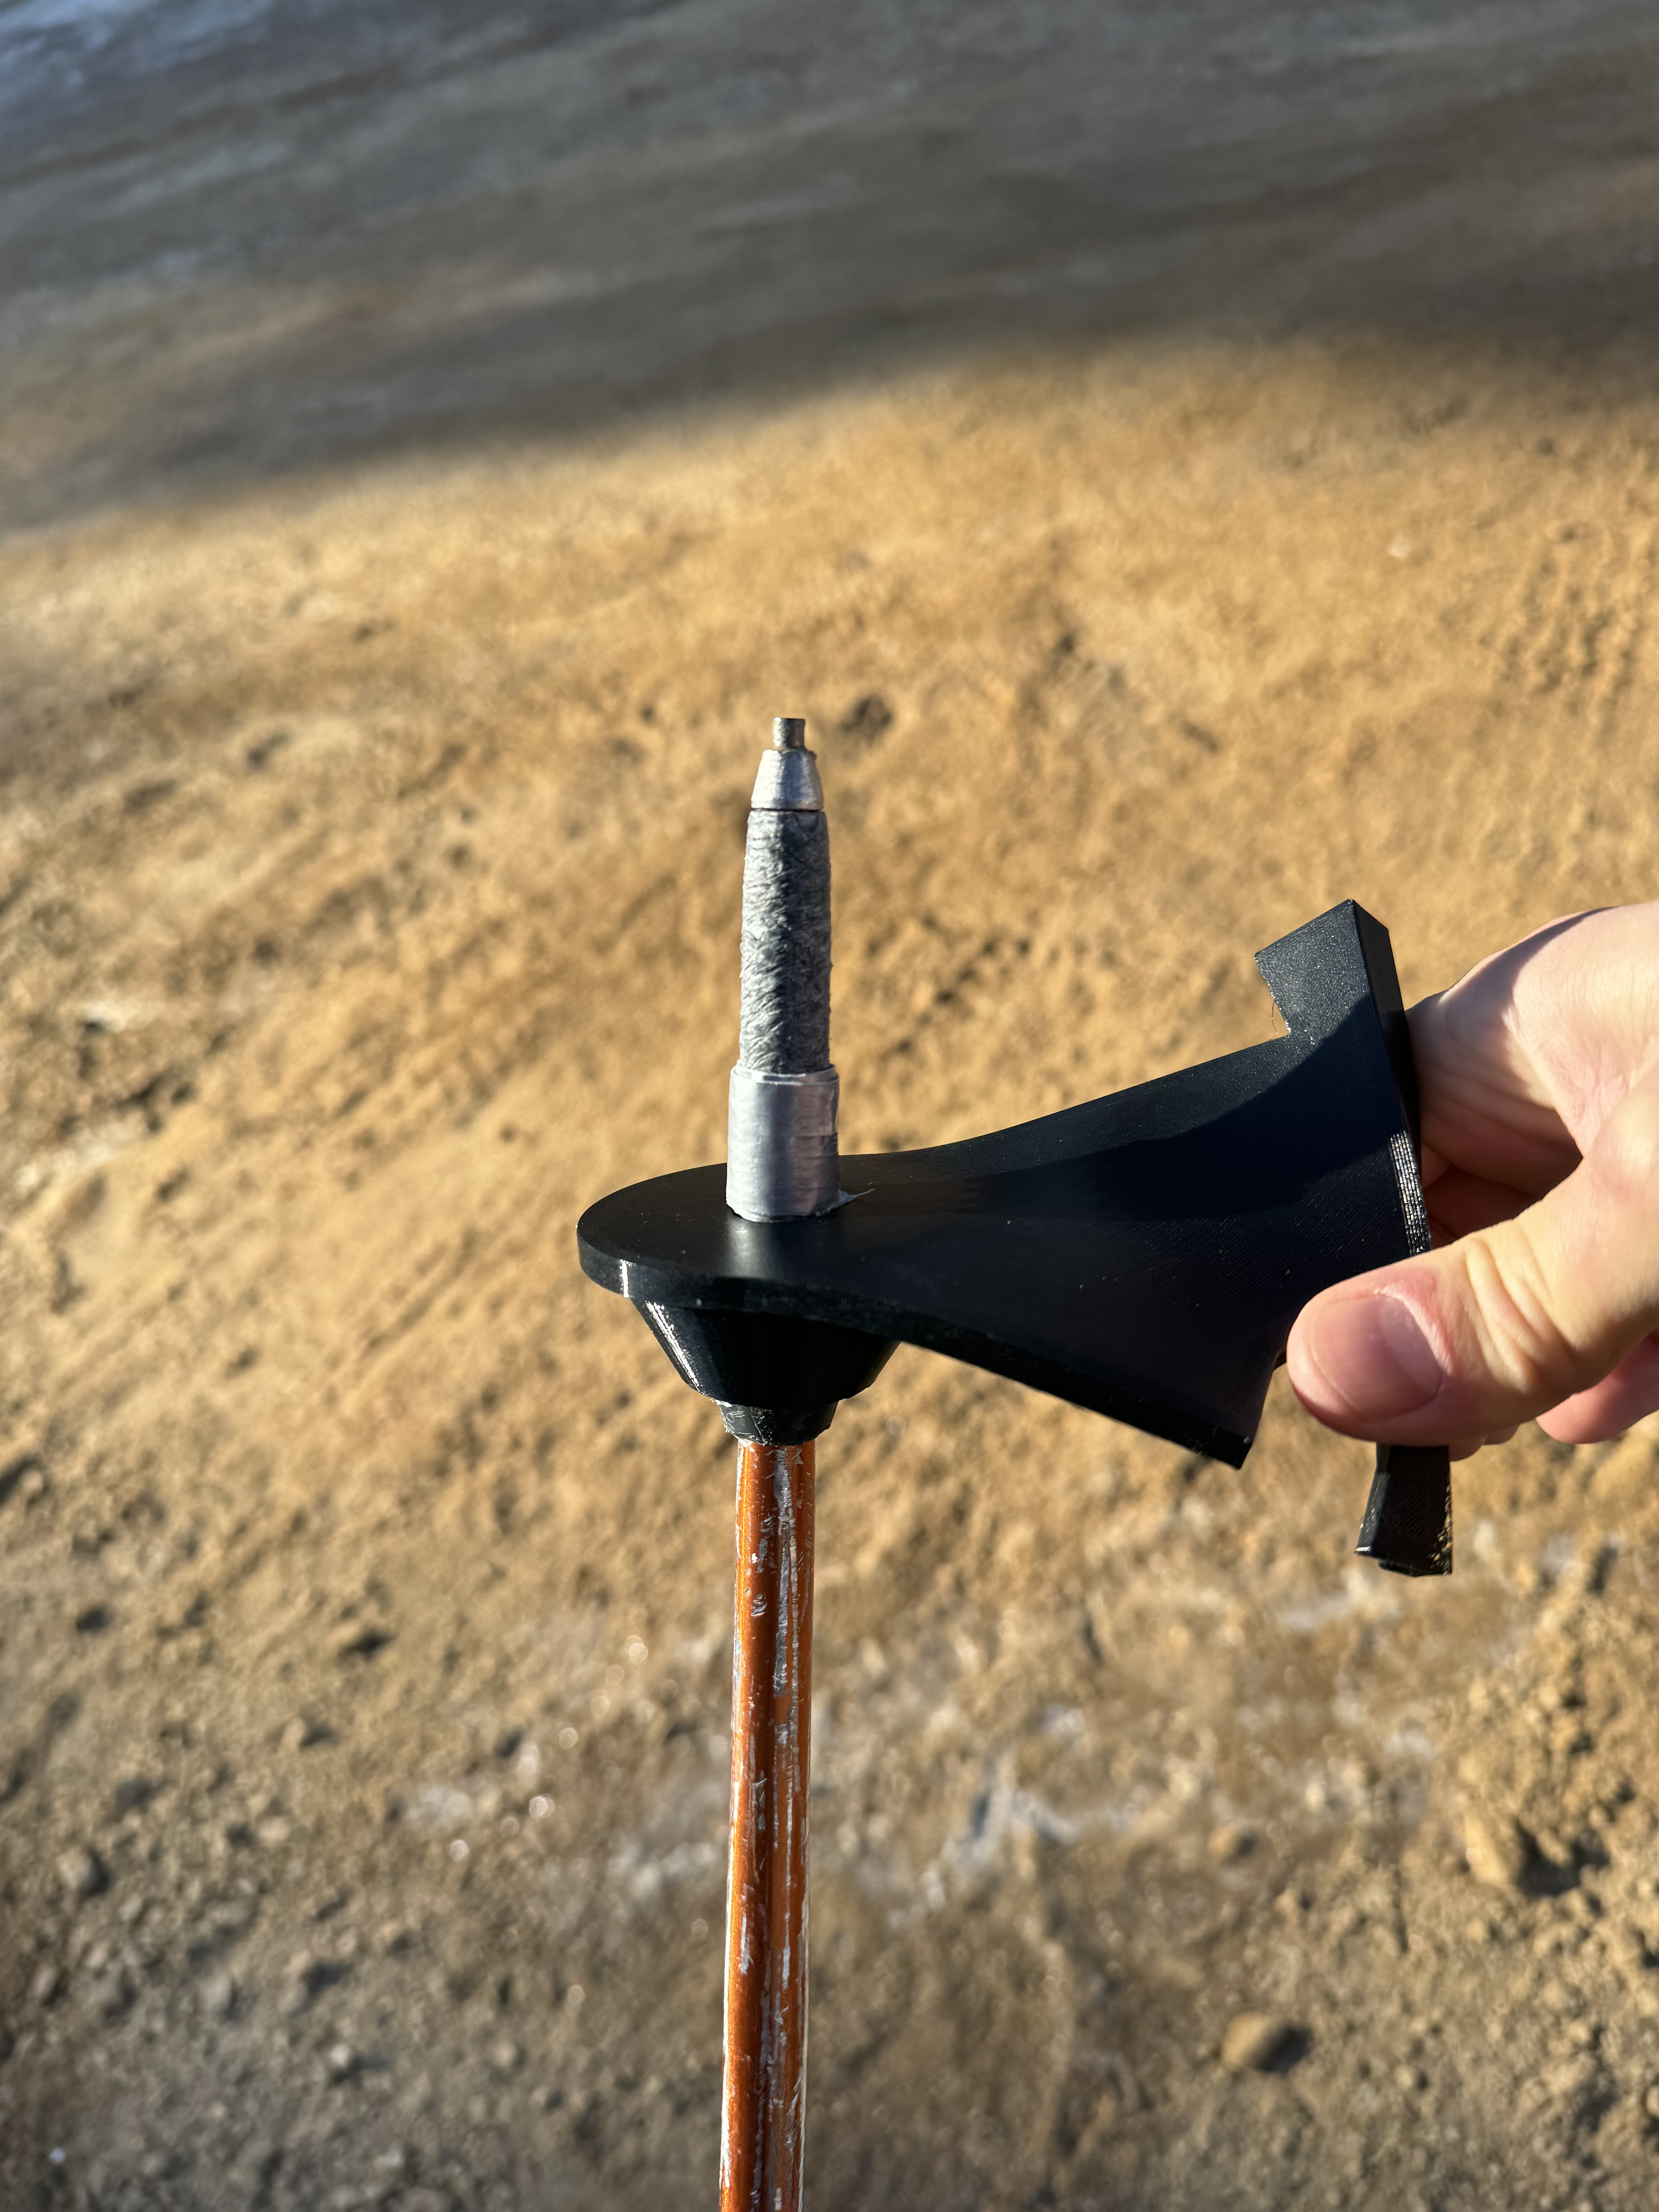
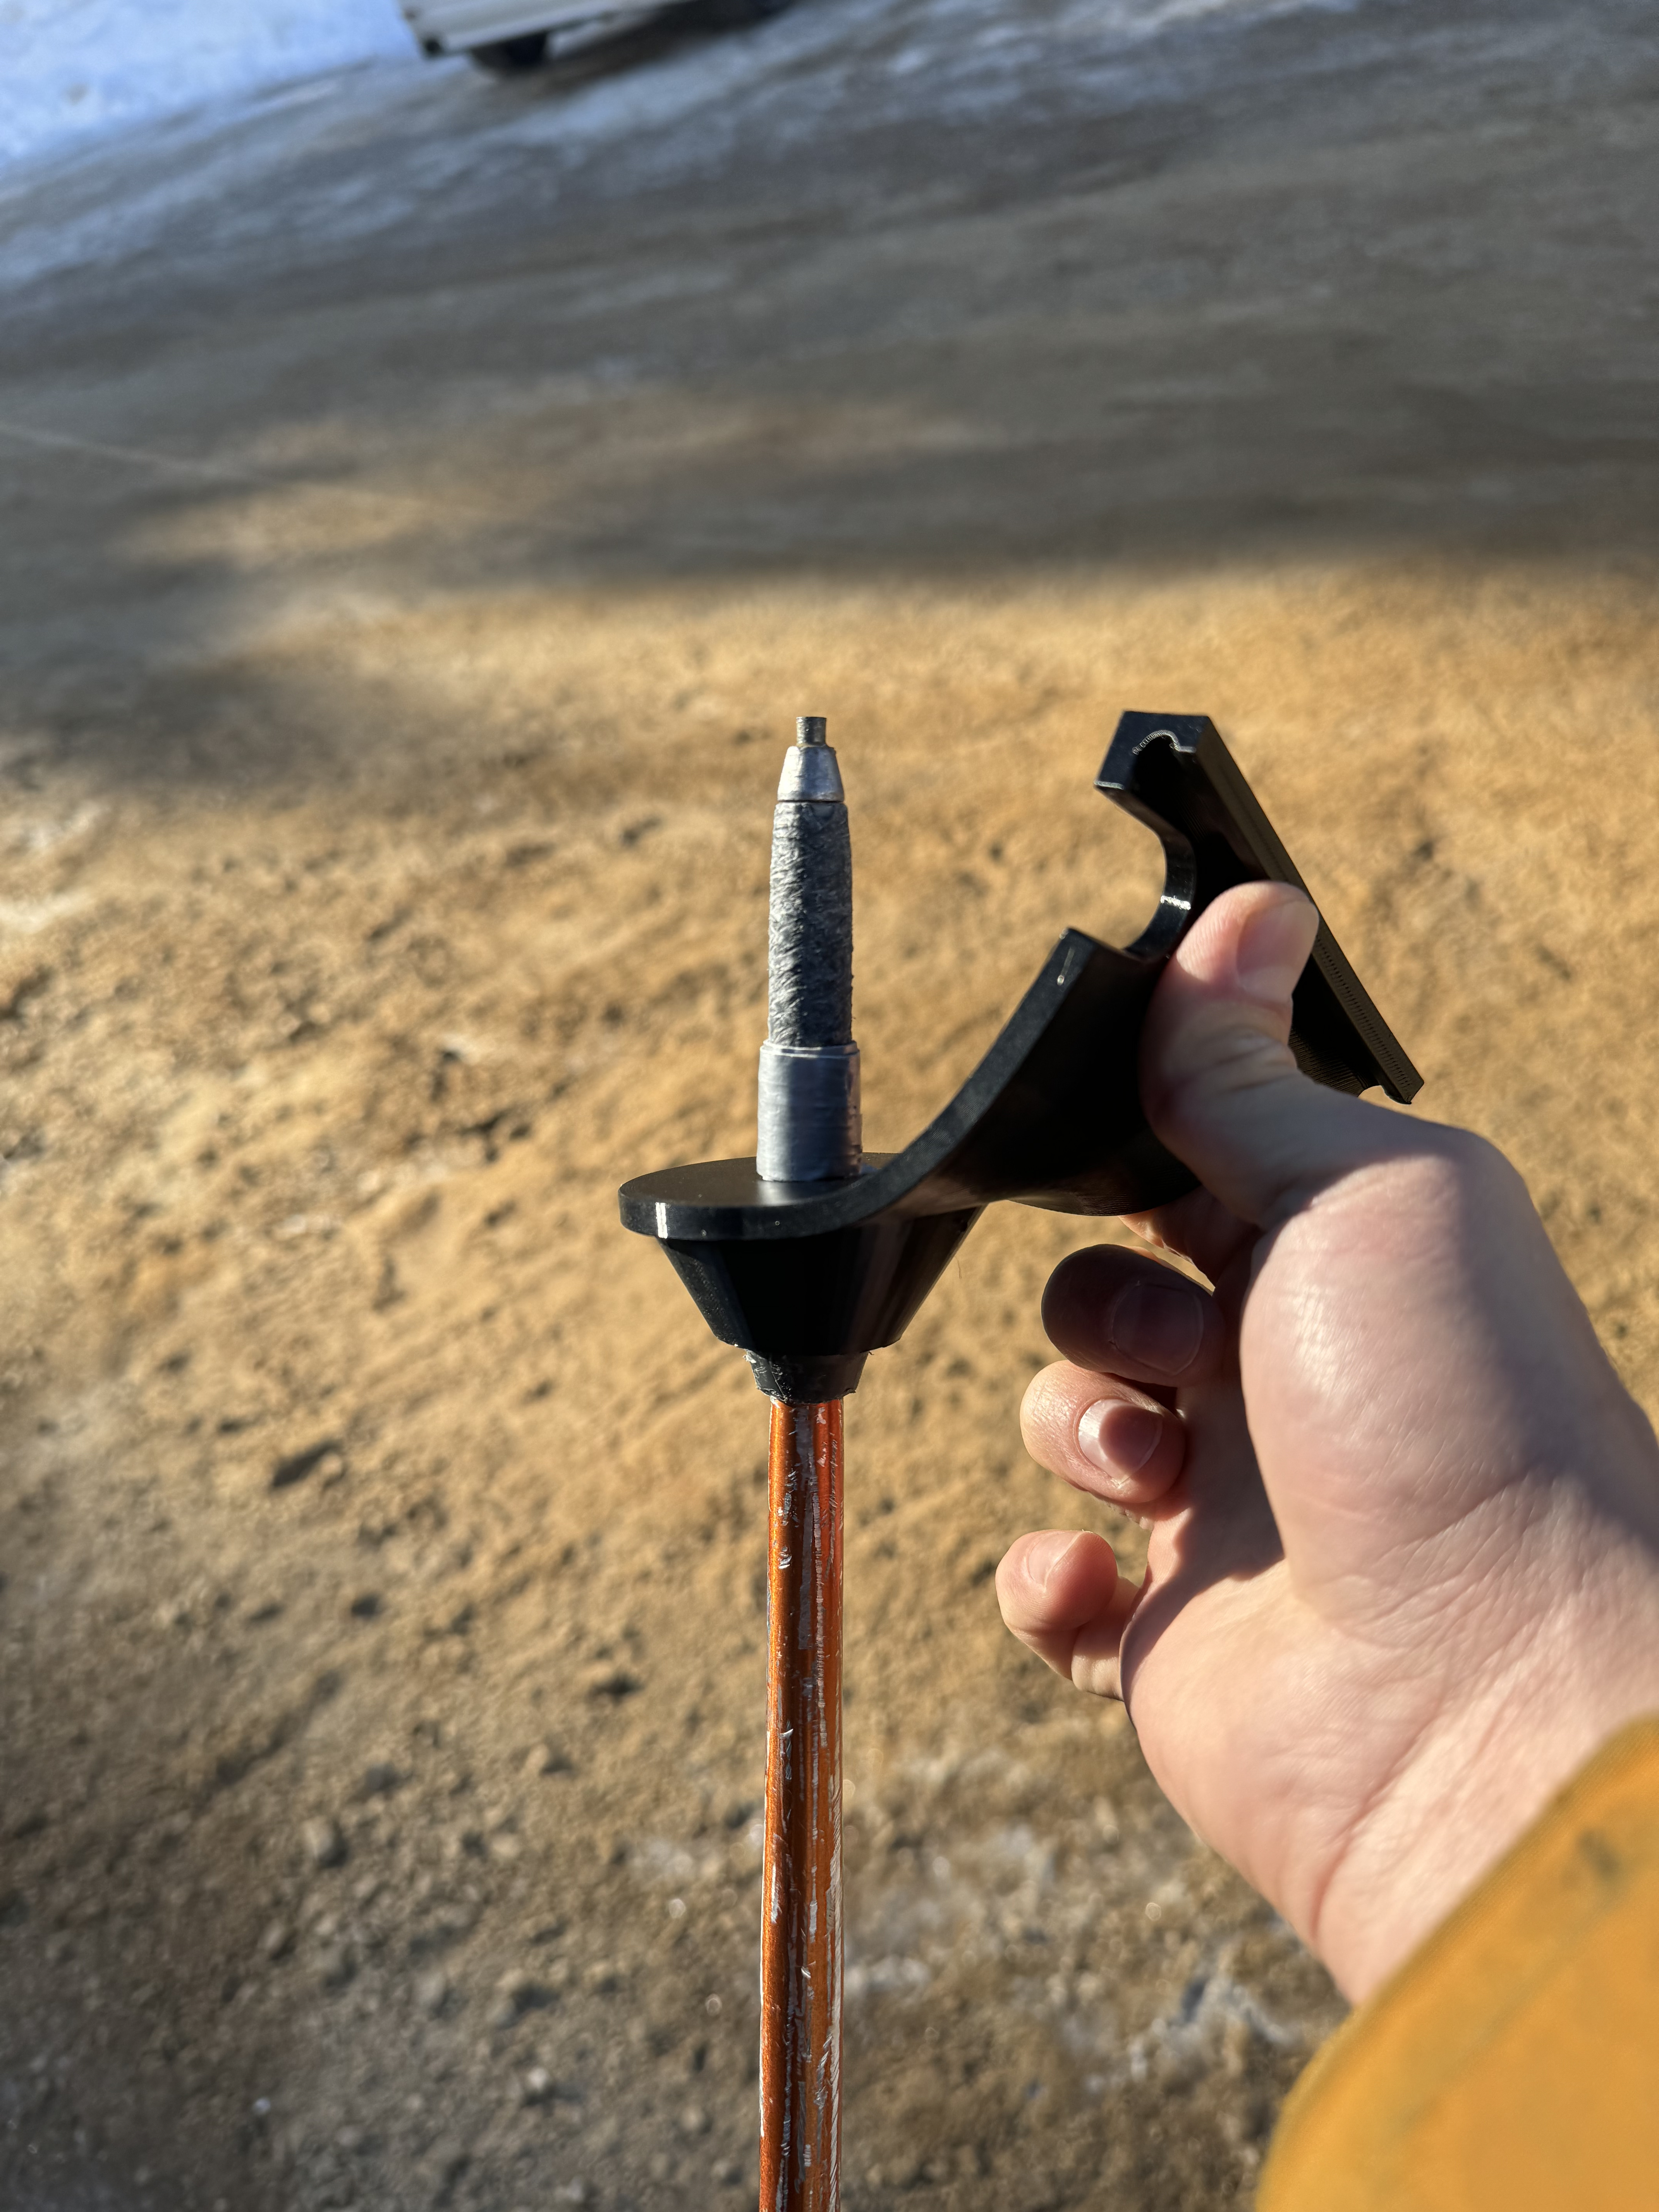
April 2024 Model T
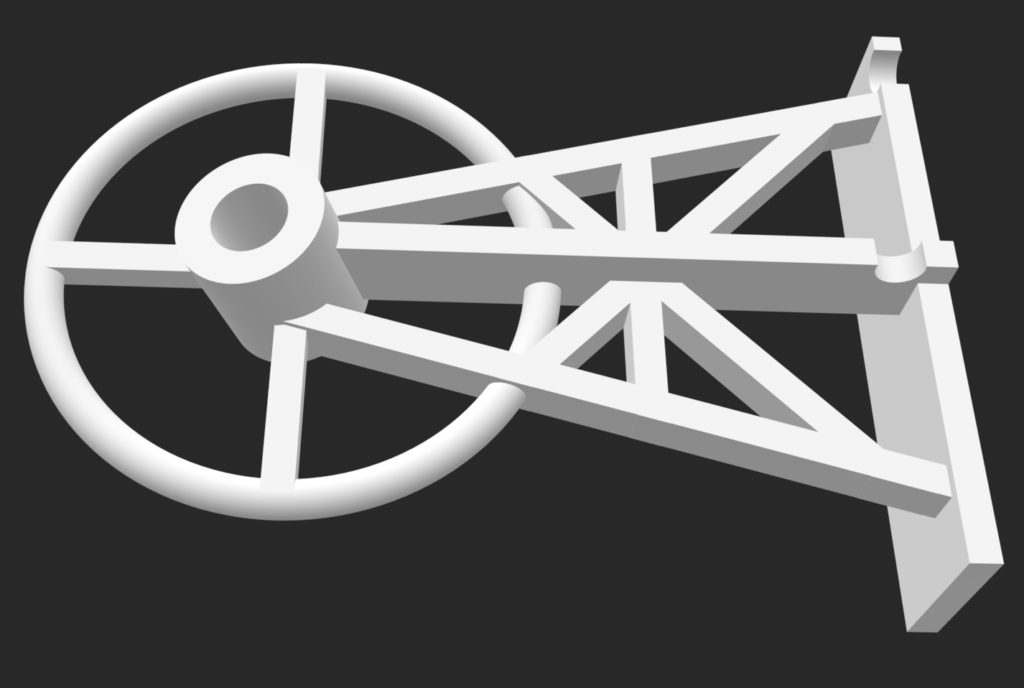
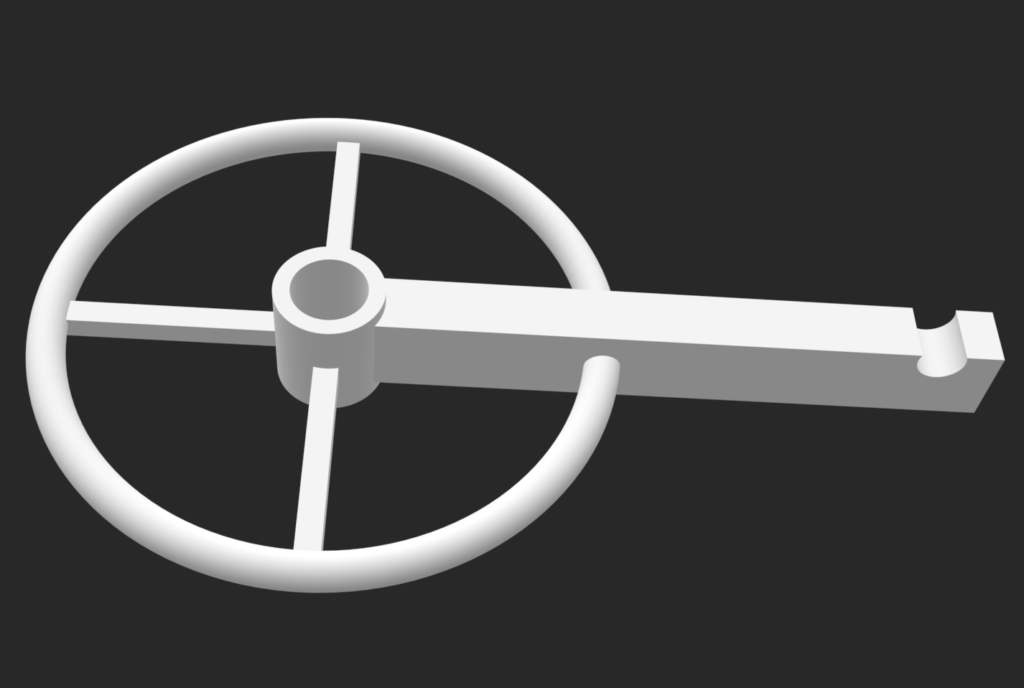
The model T was the best of my March prototypes, so I printed a batch and focused on plow size and scraper length. Another thing I tested on was the outer ring or V-shaped tail to support the pole when planting or sticking it in the snow (it would fall over in previous designs). To my surprise, the V-shape on the back did a lot of heavy lifting, helping the pole stay upright when you want it to stay in the snow. I skied these baskets on resort and did my best to use them hard and often broke them in the process.


March 2024 Prototypes Tested
As described below, I printed 4 more prototypes to test. I call them: Skeletor 3 (I don’t remember what happened to 2), Tent, Stingray (Stacey’s custom design), and T-bar. Skeletor 3 and T-Bar are deliniations of the original ‘plow’ design, which scrapes the ski from the furthest end from the pole. Tent and Stingray are side-scraper designs, similar to the ‘Monolith’ that I had attempted.
I learned a lot from this batch. First, the ‘side-scrape’ design (Monolith, Tent, Stingray) does not work. The end of the pole gets in the way and makes scraping hard. Second, Skeletor 3 and T-Bar were both successes. Skeletor 3 scraped better, but T-Bar’s simplicity was sexier. Unfortunately, they both broke. The original Skeletor model is currently my only functioning (and non-broken) design. Fear not – I’ll break that one soon enough also.
My next iteration will be focusing on the T-Bar design. I will be adjusting angles and lengths to try to hone in the design. I’m hoping I can strengthen it, so it does not break with our current materials by adjusting infill, but I may also try to print with different materials. I’m putting an order in for 10 different T-Bar designs to test before the end of the season. I’ll be sure to update here!


Prototyping
The Skeletor was a great success, in that it 1) worked and 2) allowed me to test many different qualities of the basket design, 3D printing capabilities, and TPU material.
Some problems I began to solve for were: v3 was too large (shorten, increase angle, increase plow size), it carried too much snow (make holes bigger), it needed a skin scraper (make raised bar down middle), and the rear ‘tool’ was useless (remove or improve). With that in mind, I created a few prototypes that stayed true to the v3 ‘plow’ design.
One key learning was that the basket could potentially scrape the top (and bottom) of the ski sideways. Instead of having the ‘plow’ at the end, I can have scrapers running along the side. This has lead me to a possible new design, which is a simple block / bar (think of the monolith from 2001: A Space Odyssey – I even drafted a 1x4x9 version, like in the book).
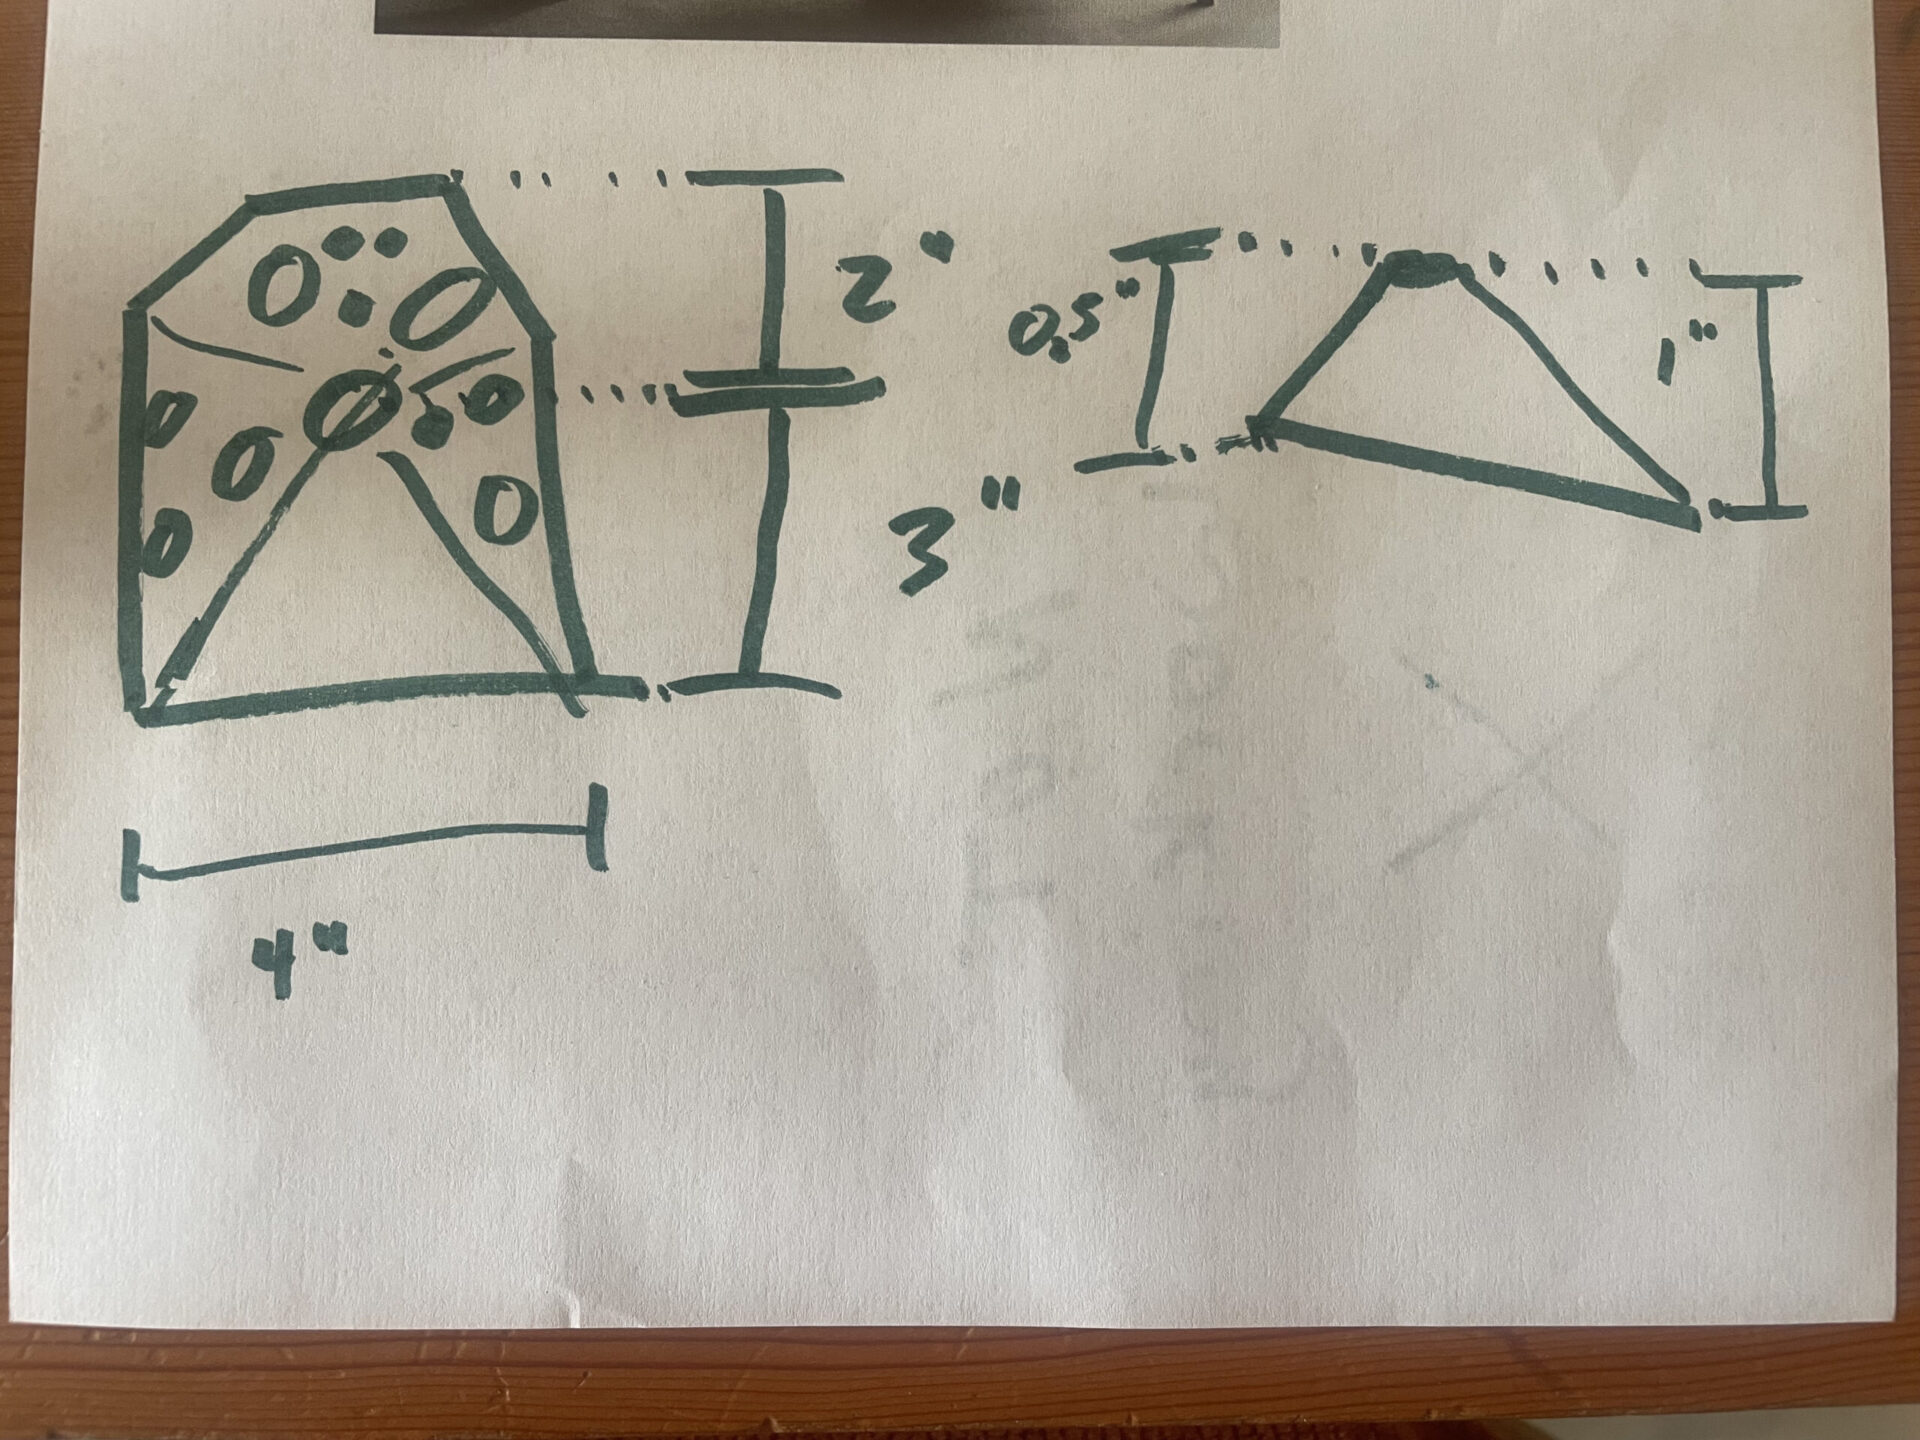
Version 3 – Skeletor
Printed on March 21st, this is my most functional basket yet. I have increased the length, extended the ‘plow’ on the front, and increased the ‘drop’ angle form 5 degrees to 10 degrees — all to make it easier to scrape the snow off your ski.
Additionally, I’ve added a raised edge on the back to adjust risers / bindings and lots of holes to prevent snow from staying on top.
The next version will likely be slightly less long, have a larger drop (15 degrees?), a bigger ‘plow’, and a raised bar for scraping skins on top. I may also take some additional steps to reduce material further.
Version 2.3
The first (mostly) functional prototype. This is a TPU printed v2 model and has proven that TPU is the correct material for the product. The threading / pole hole was too large, so I used some duct tape to keep it on the pole.
This model has proven that TPU is strong enough and has the right rigidity properties. The scraper at the front was very tough, so I may use ‘bars’ like it to create the next model.
The ‘tools’ I had built into the side edges proved to be worthless with TPU, so I will remove those in the next version. Also, the pointy part of the pole gets in the way of scraping, so I will make adjustments to length and angle.
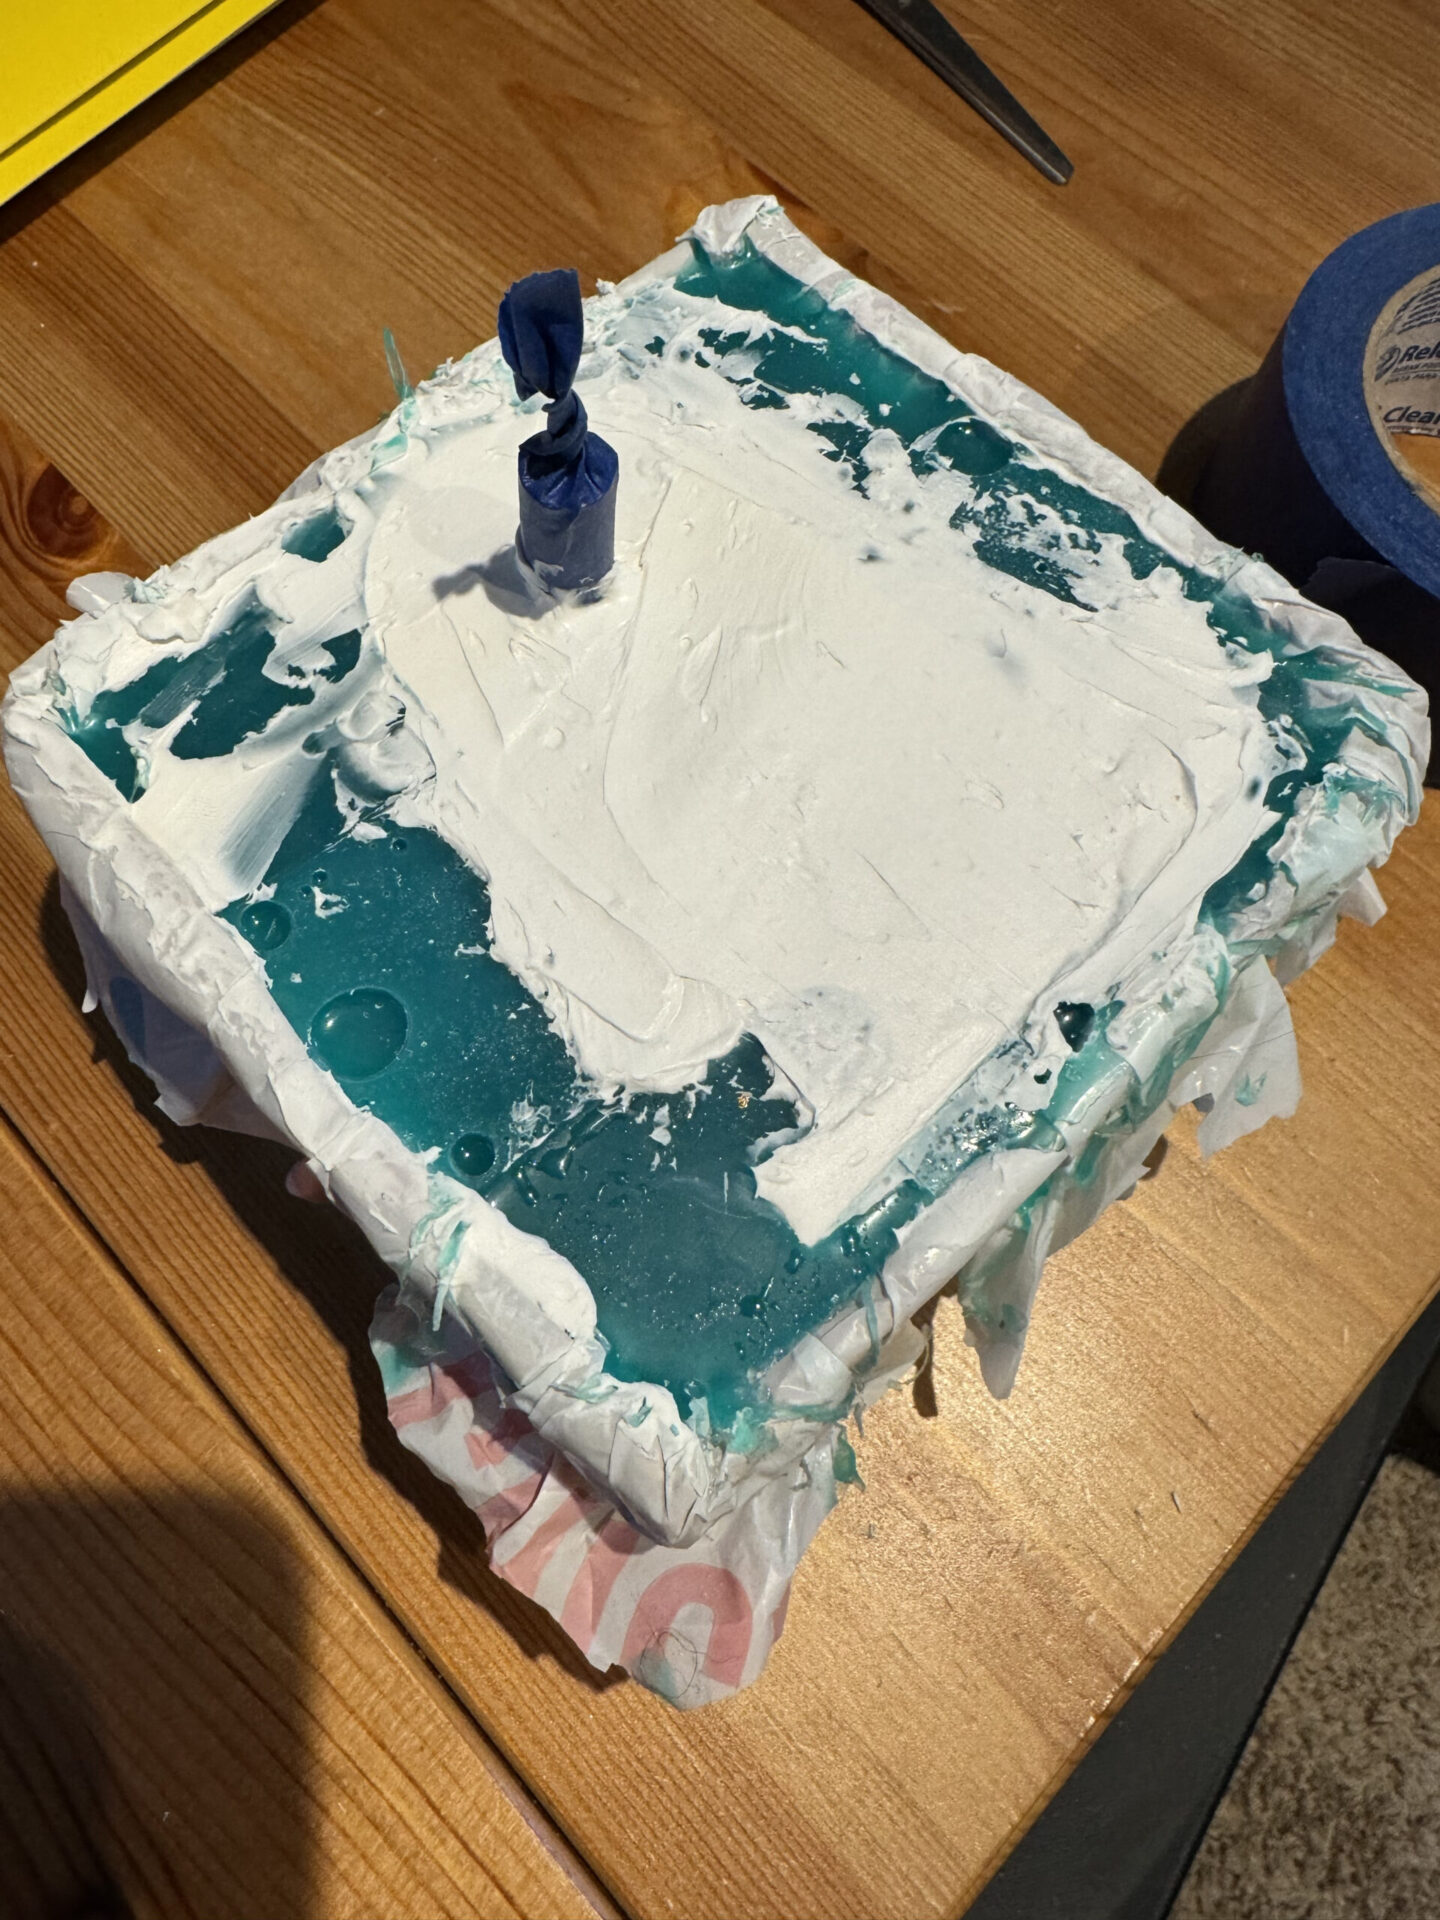
Version 2.2 – Caulk and Plastic Folders
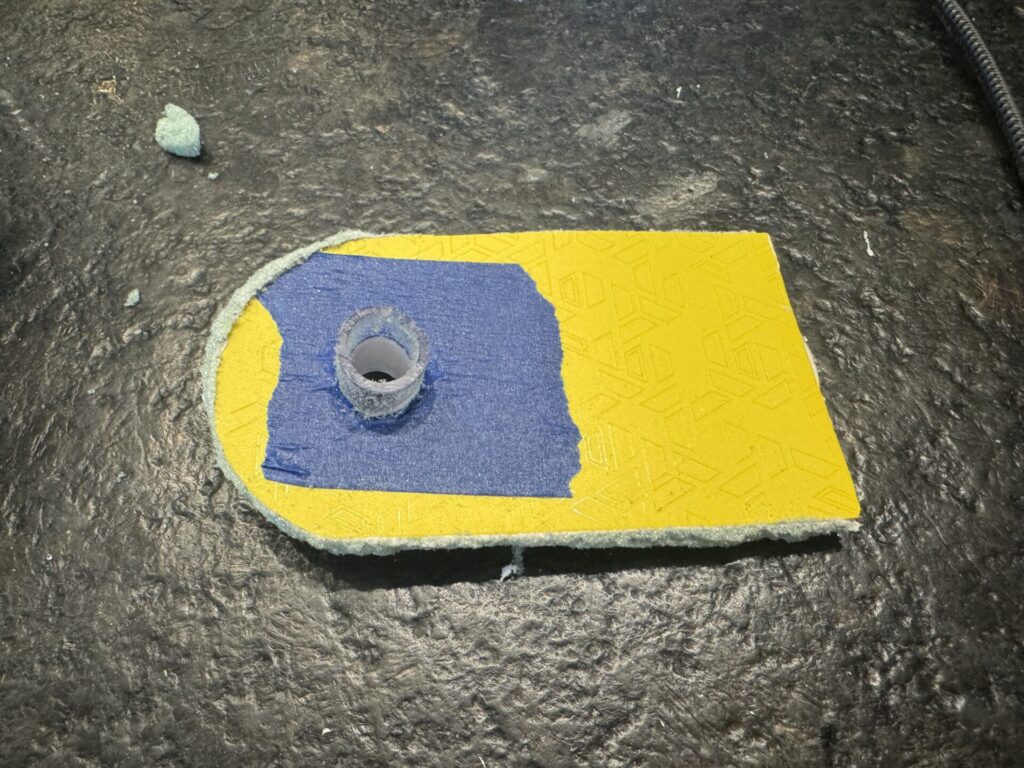
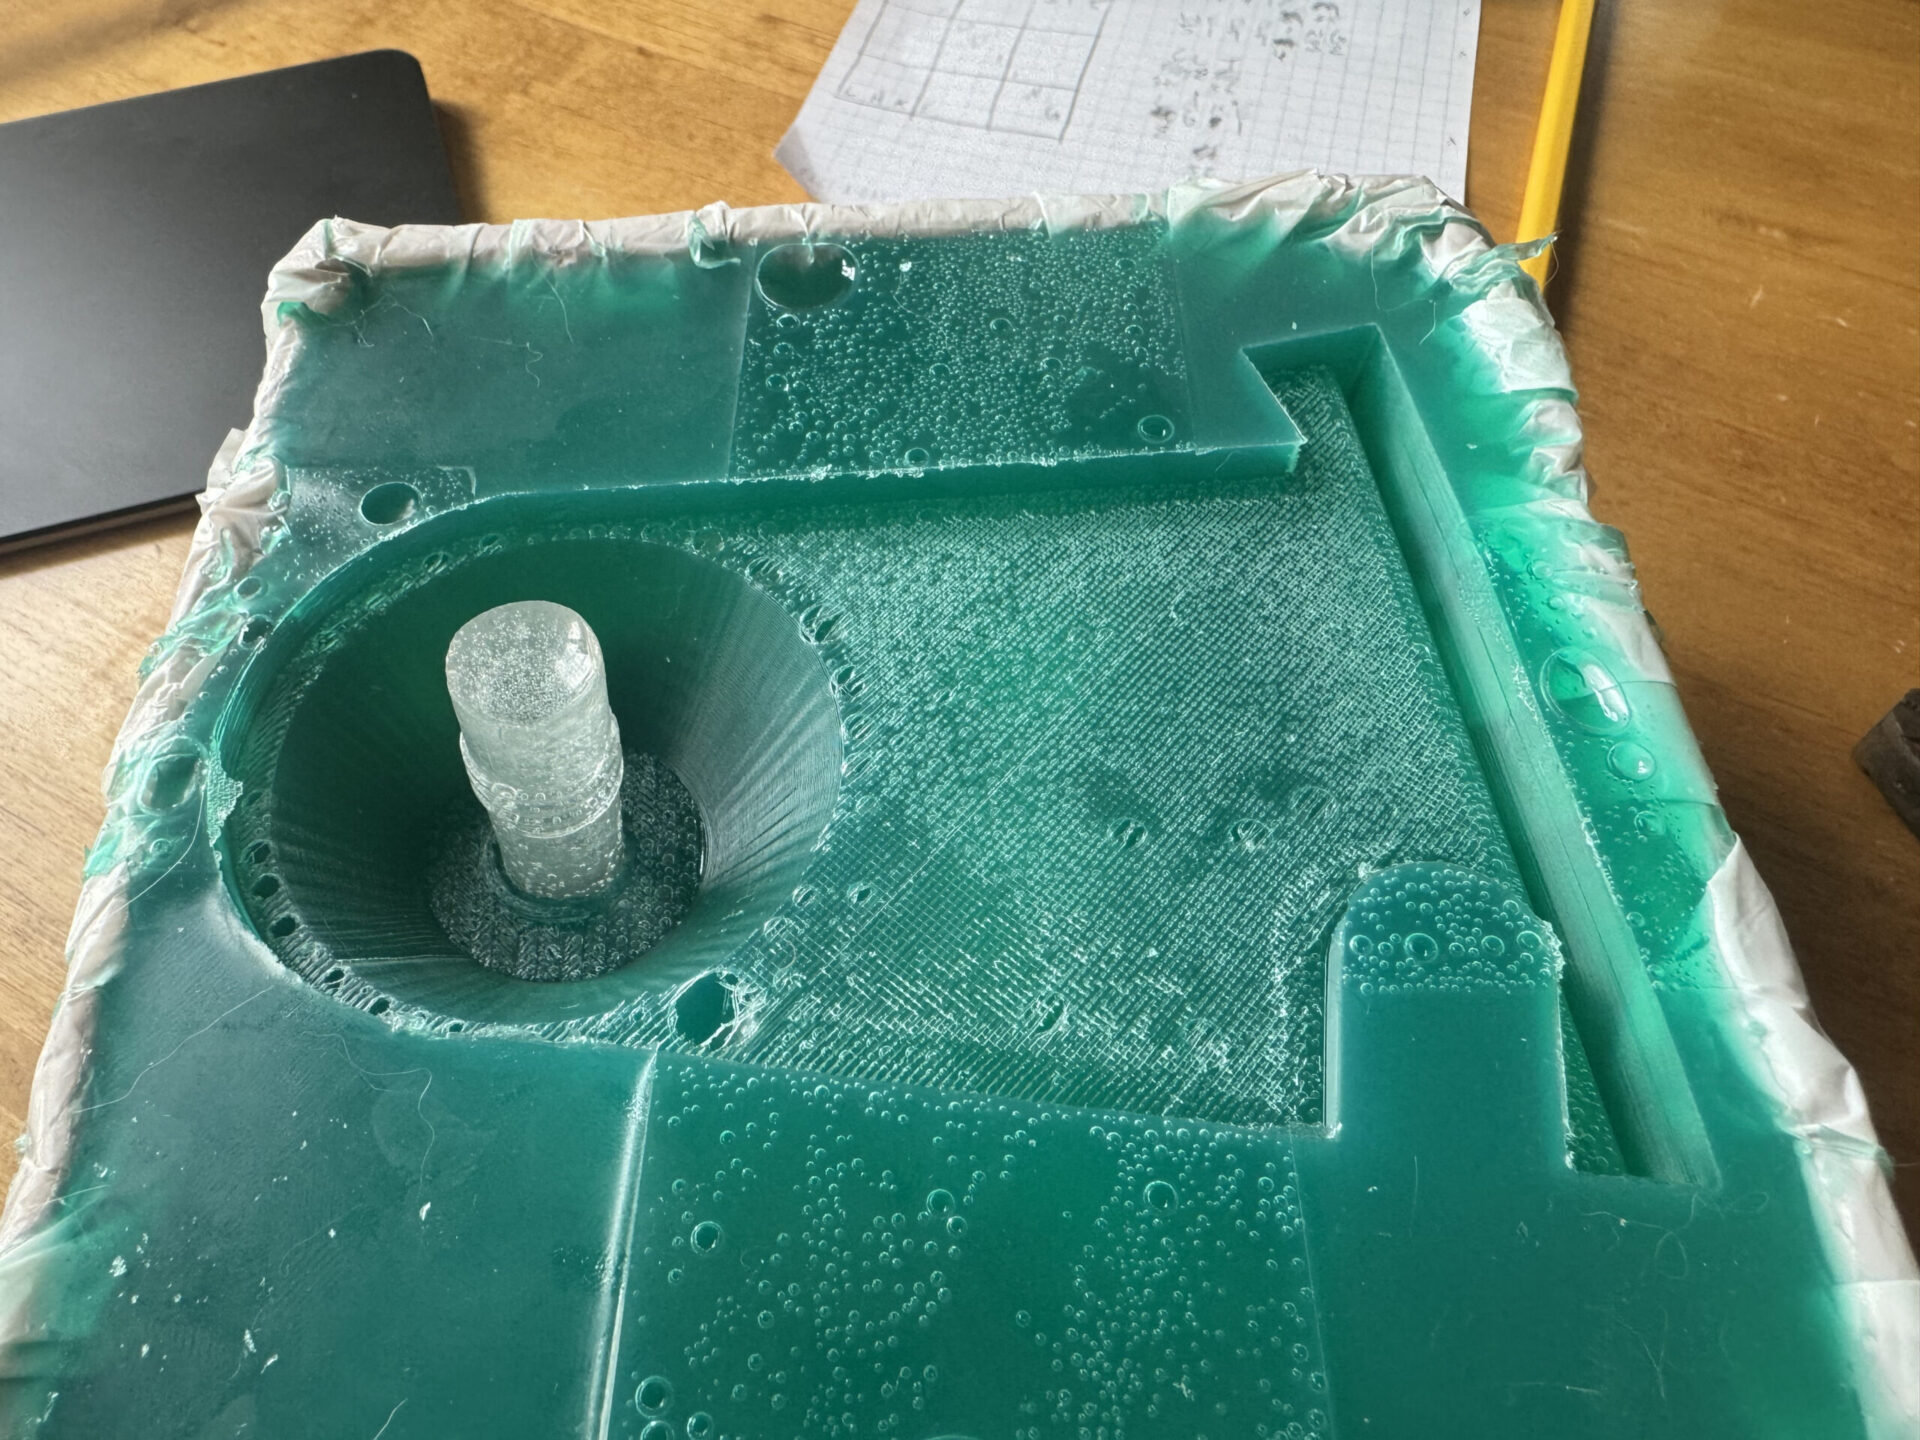
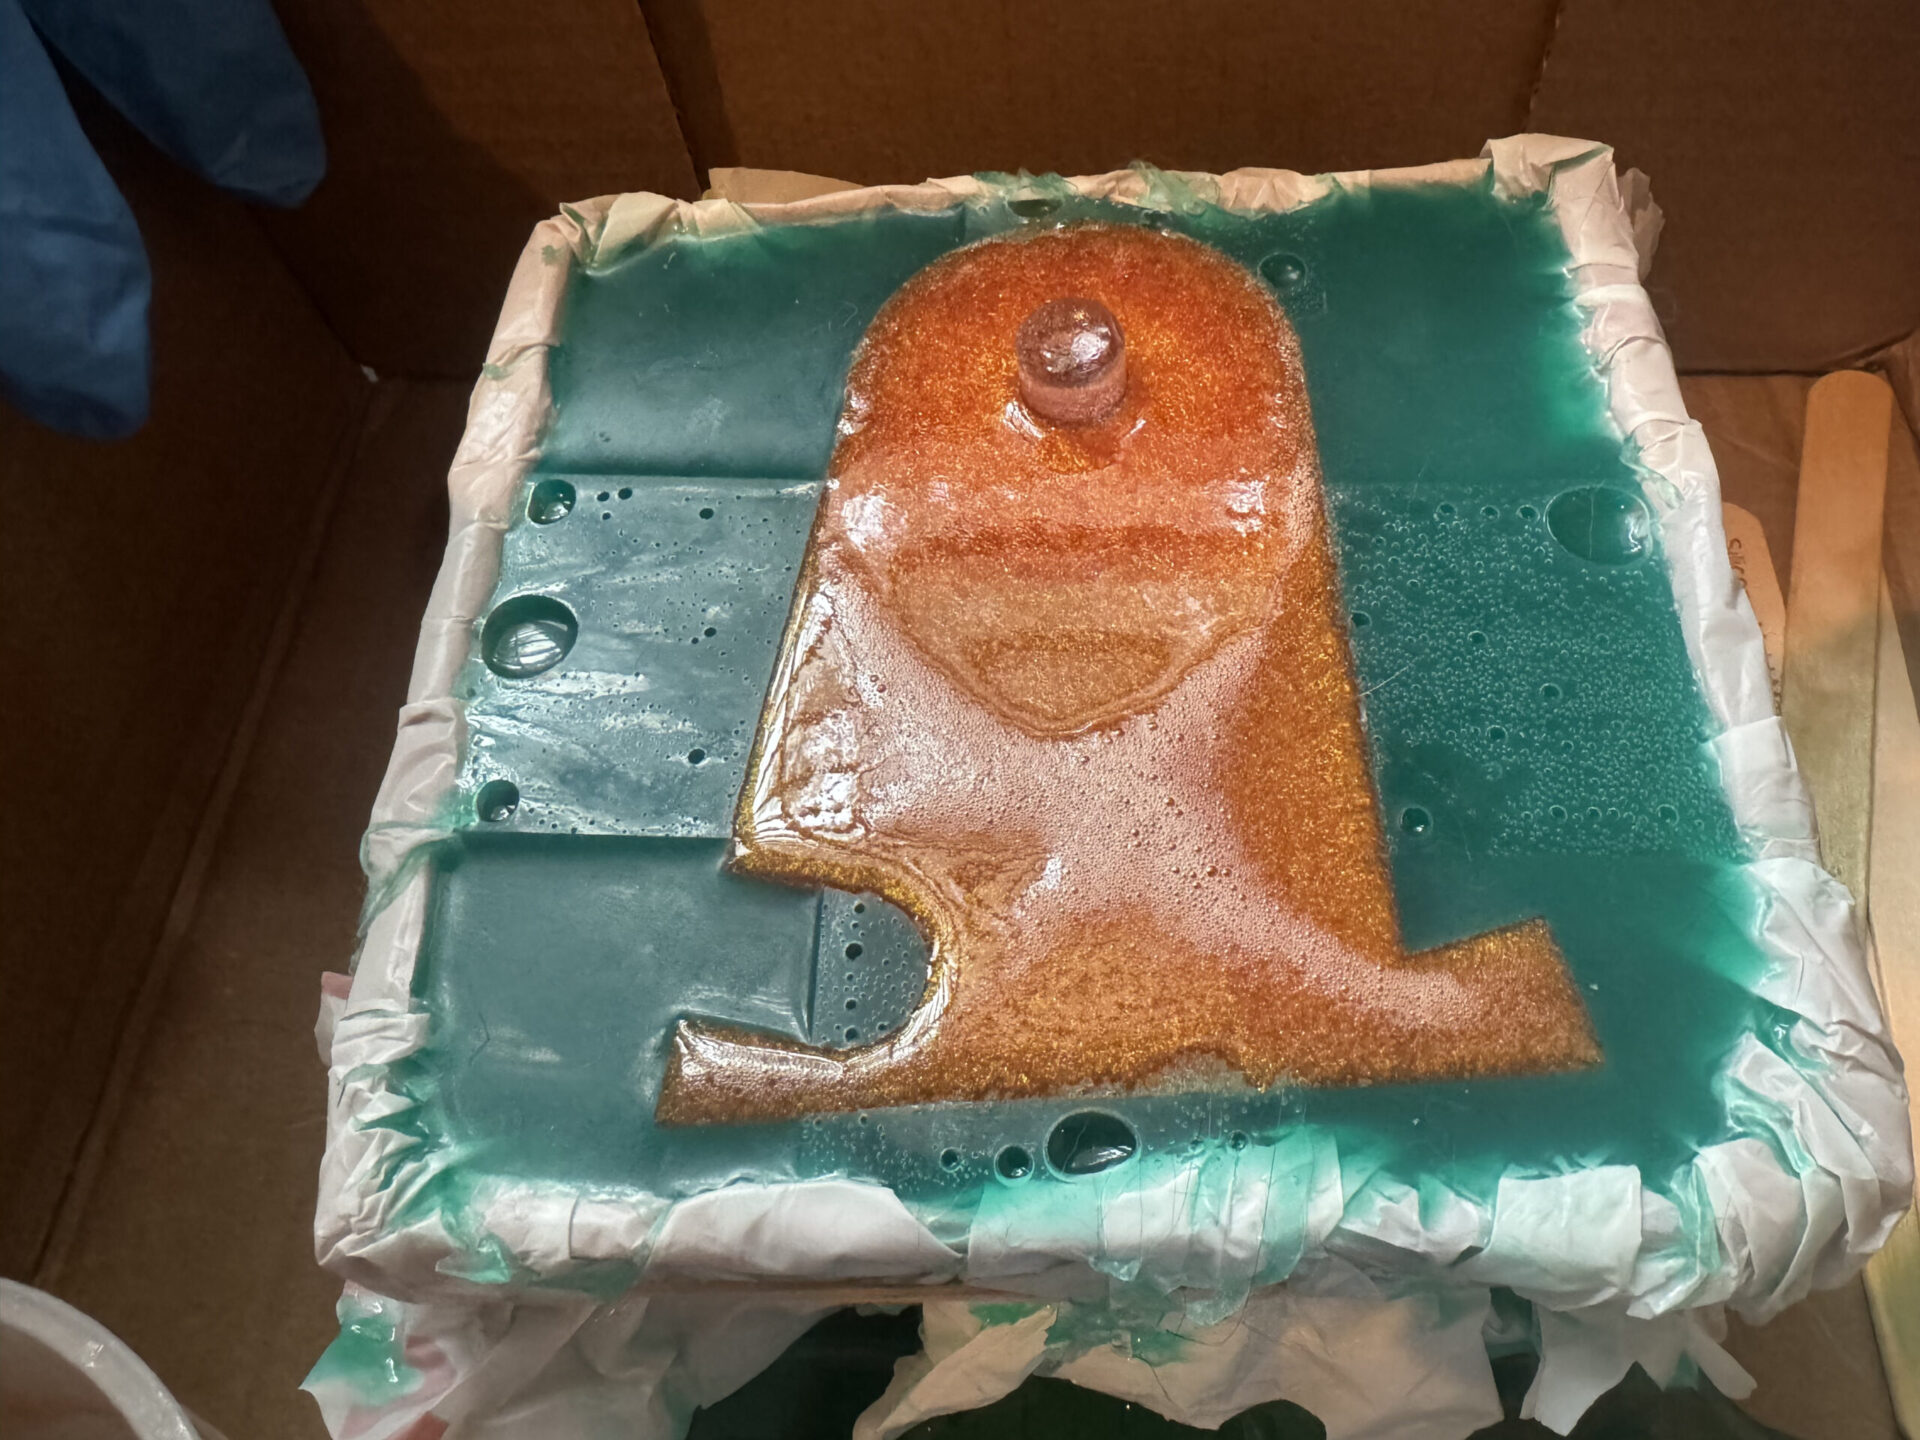
I’m including a 3 different iterations in this 2.2 category. They’re all pretty laughable but sometimes you just gotta try something new and you never know what good ideas may result.
One is made using my existing mould and a lot of caulk. My goal was to create a less rigid version of v.2 on the cheap (3D printing is expensive!). This model will take a long time to dry, so I poured it into the mould and I’ll come back to it in a month. Maybe I can learn something about using moulds with caulk that will allow me to produce cheaply in the future.
The other two models are made with plastic tubing, plastic folders, and caulk in the middle – like an Oreo. Similarly, I made these and stuffed them away – I’ll check back in a month. These models are just meant to test the theory of using similar materials in the future.
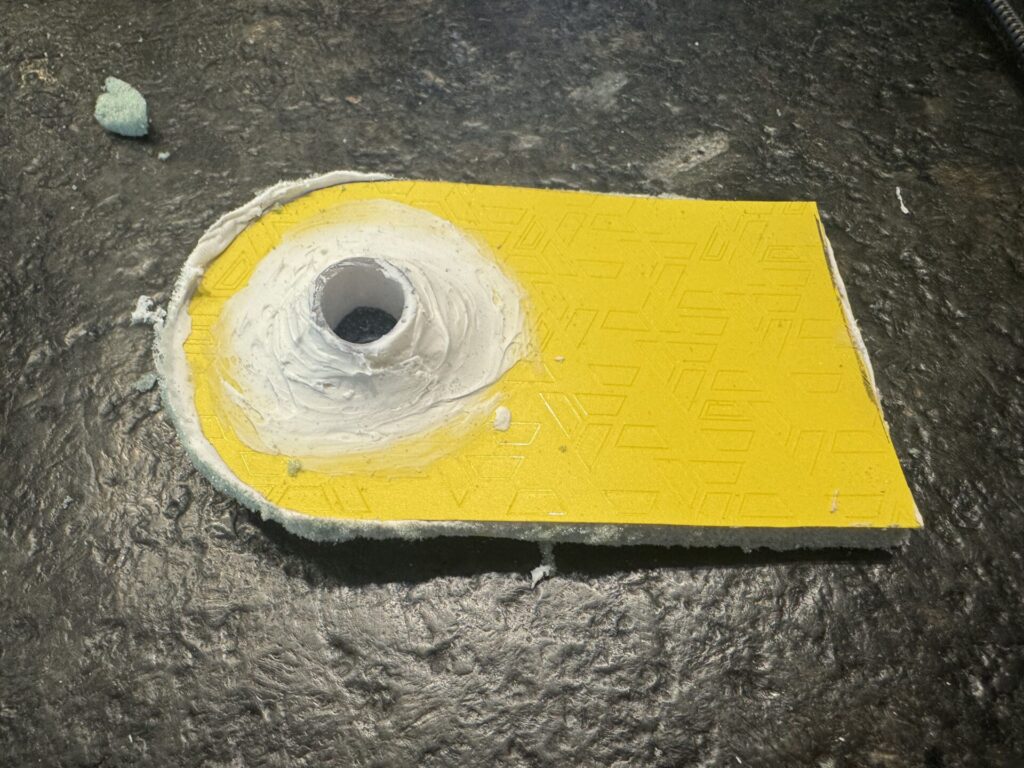
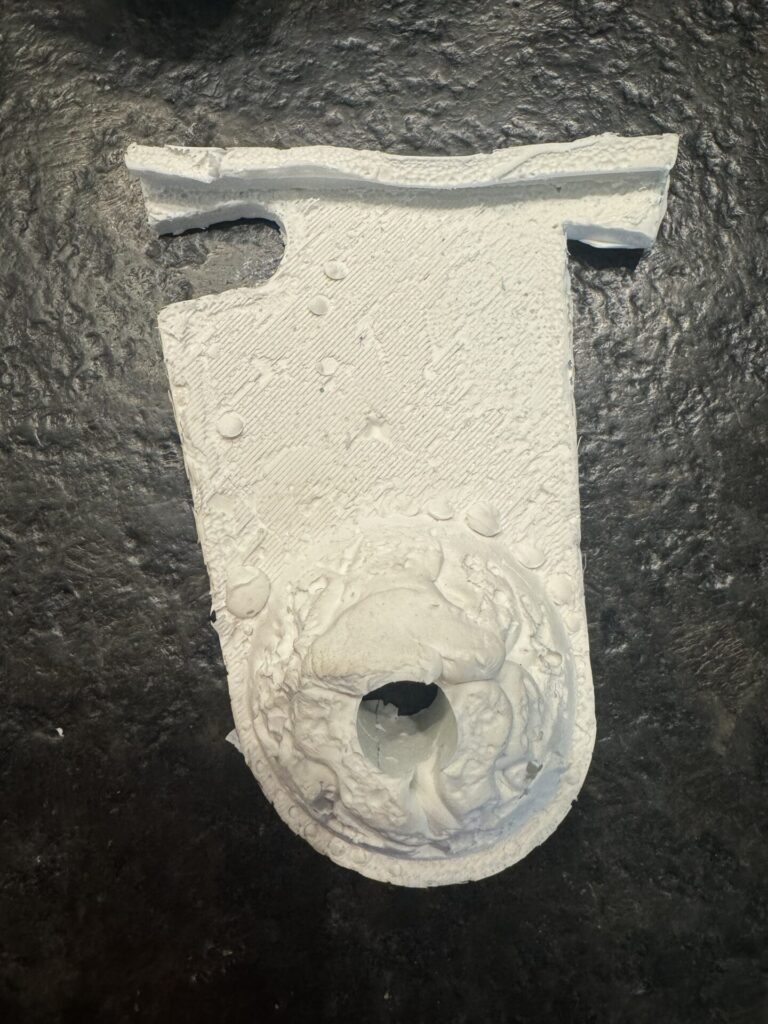
Update – April 2024
After letting them sit for a couple months, these prototypes were still not fully dry. I did not achieve the desired results and abandoned this manufacturing process to pursue 3D printing. Adding bottom 3 pictures of the ‘final’ product before they were tossed along with my moulds.

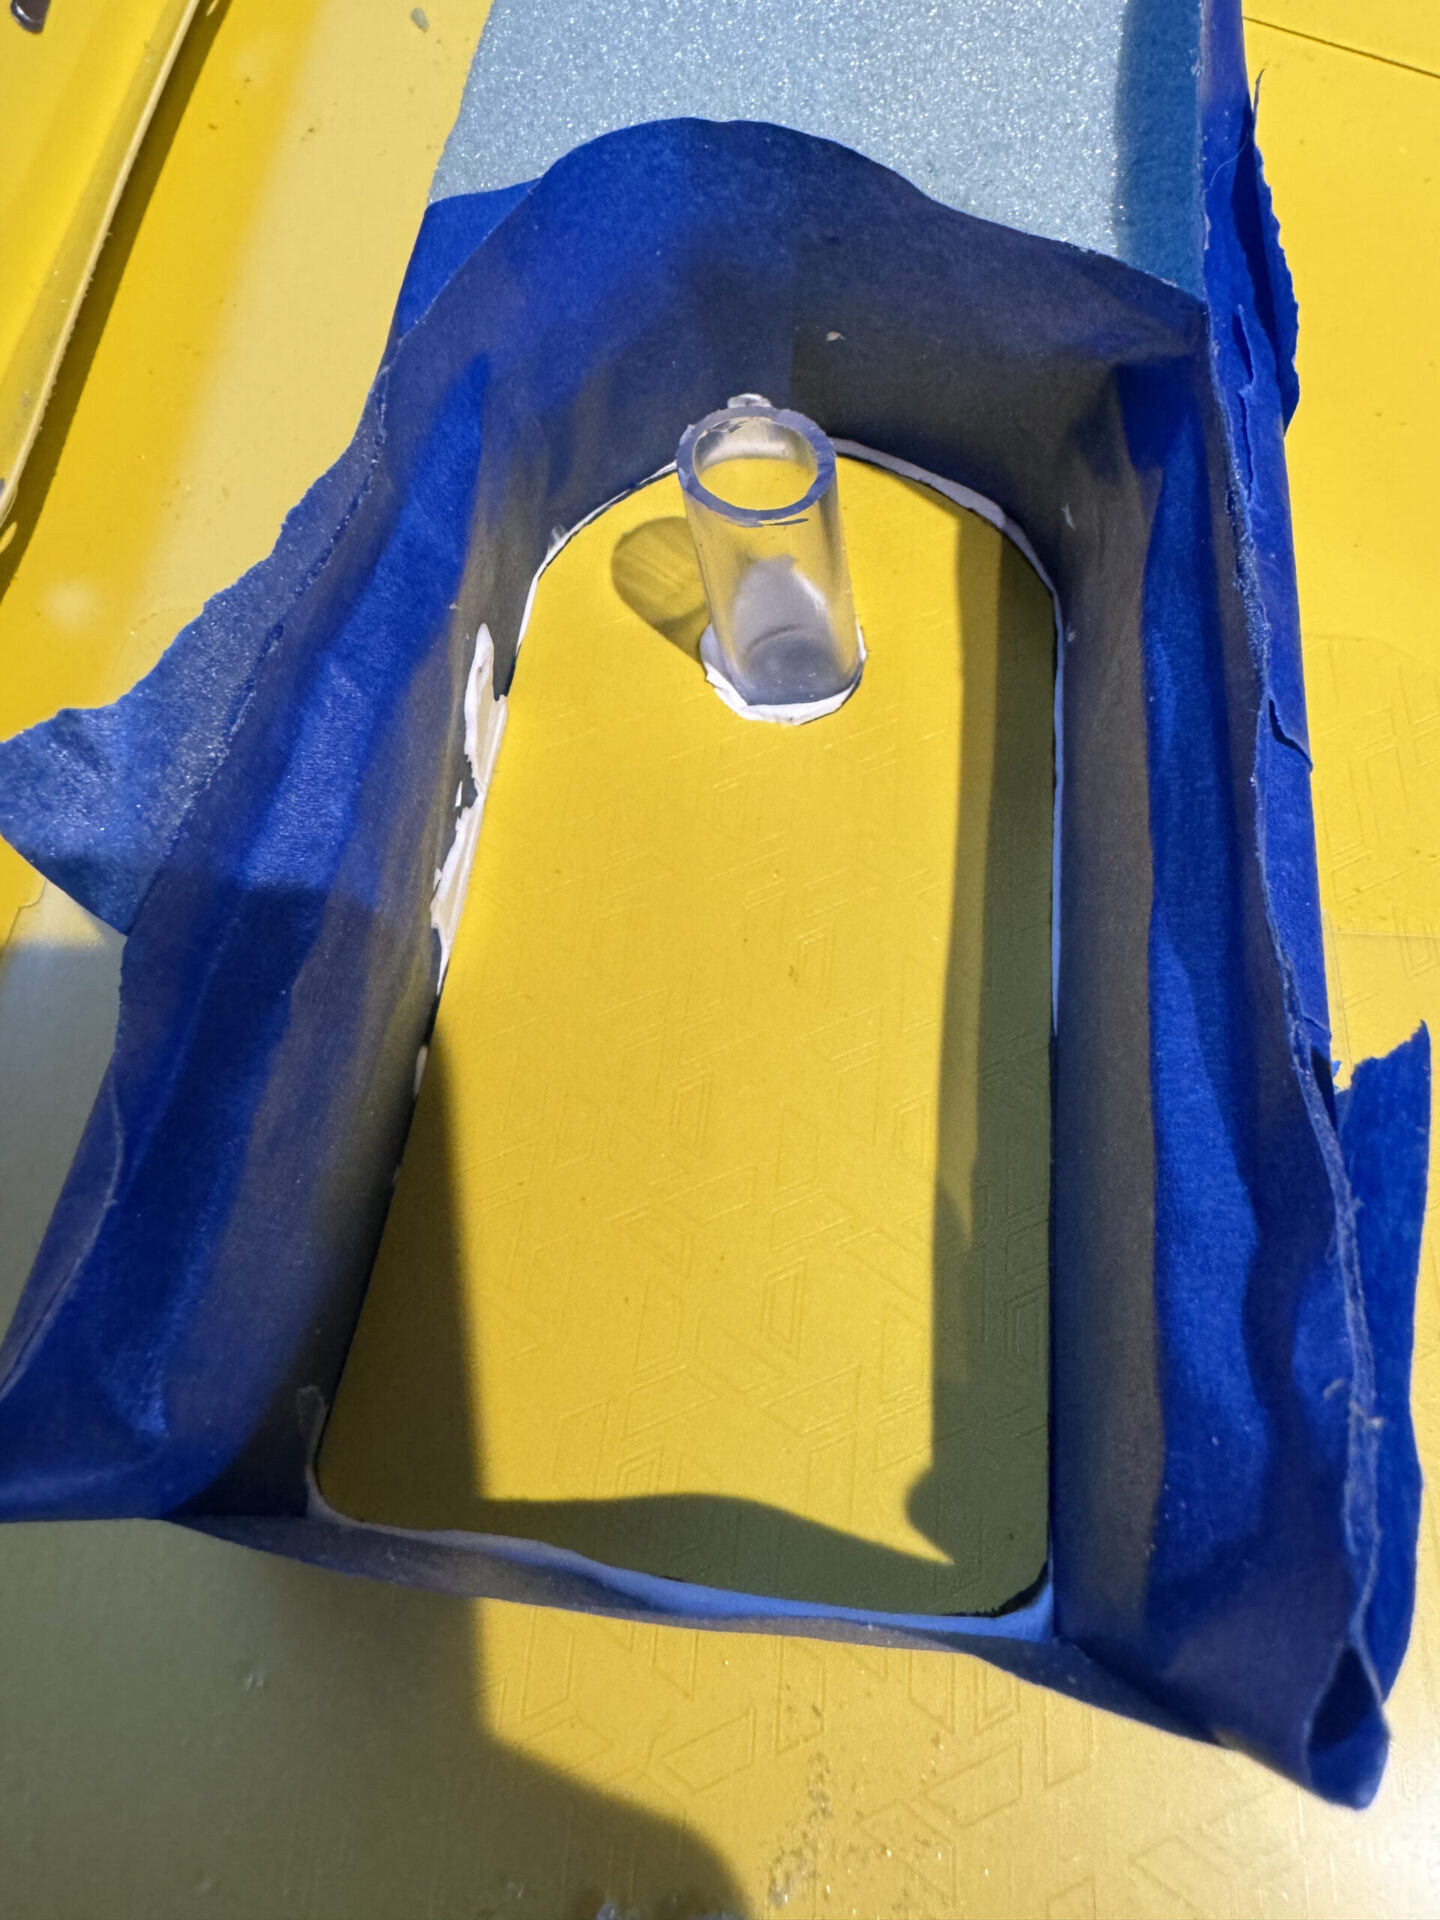
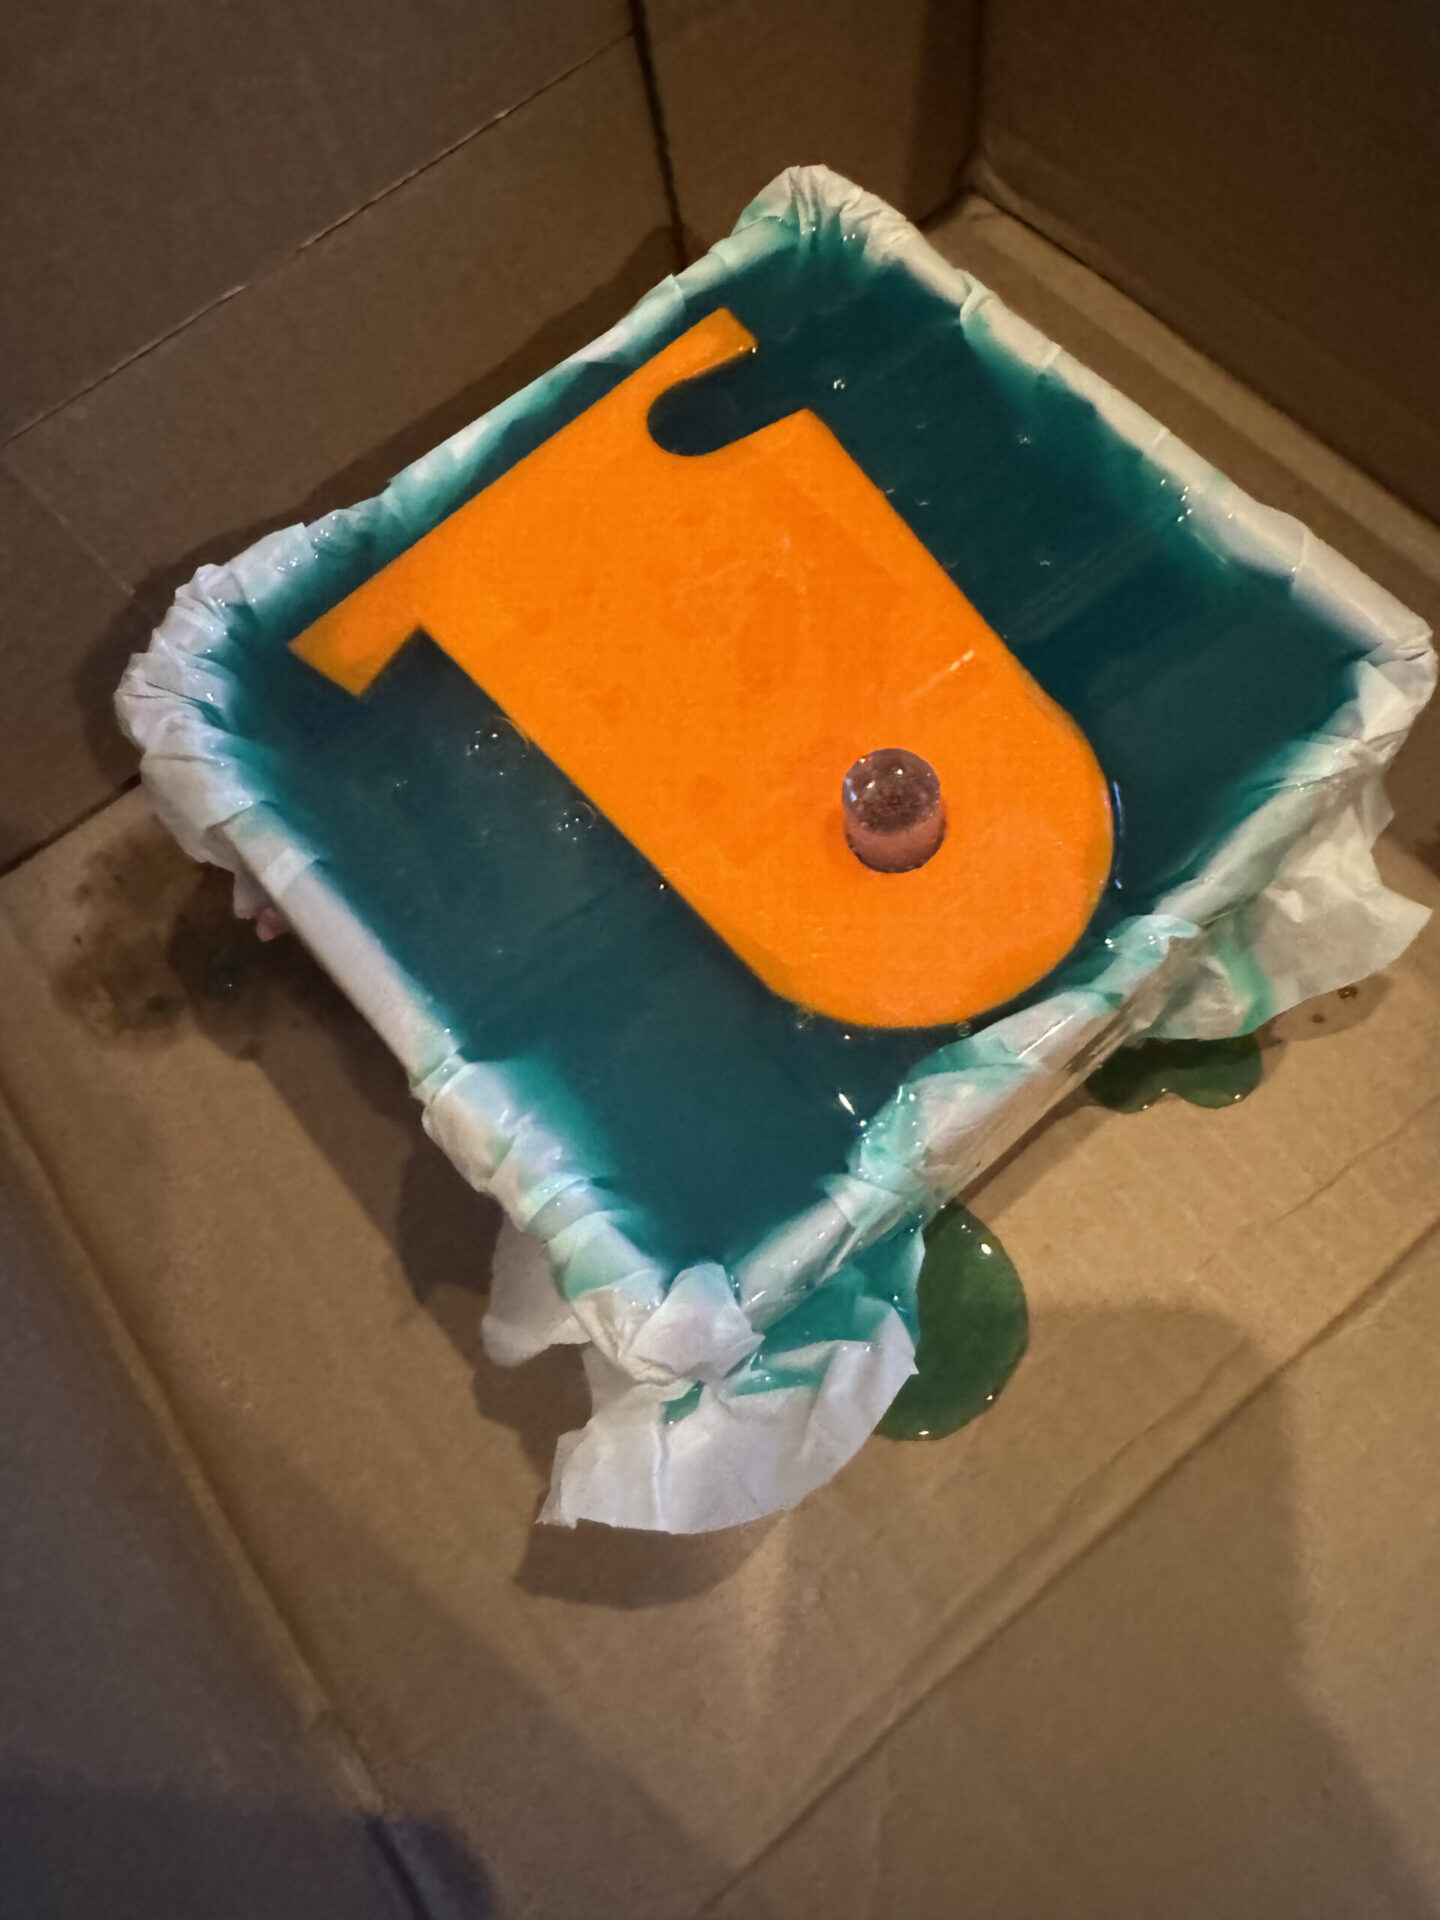
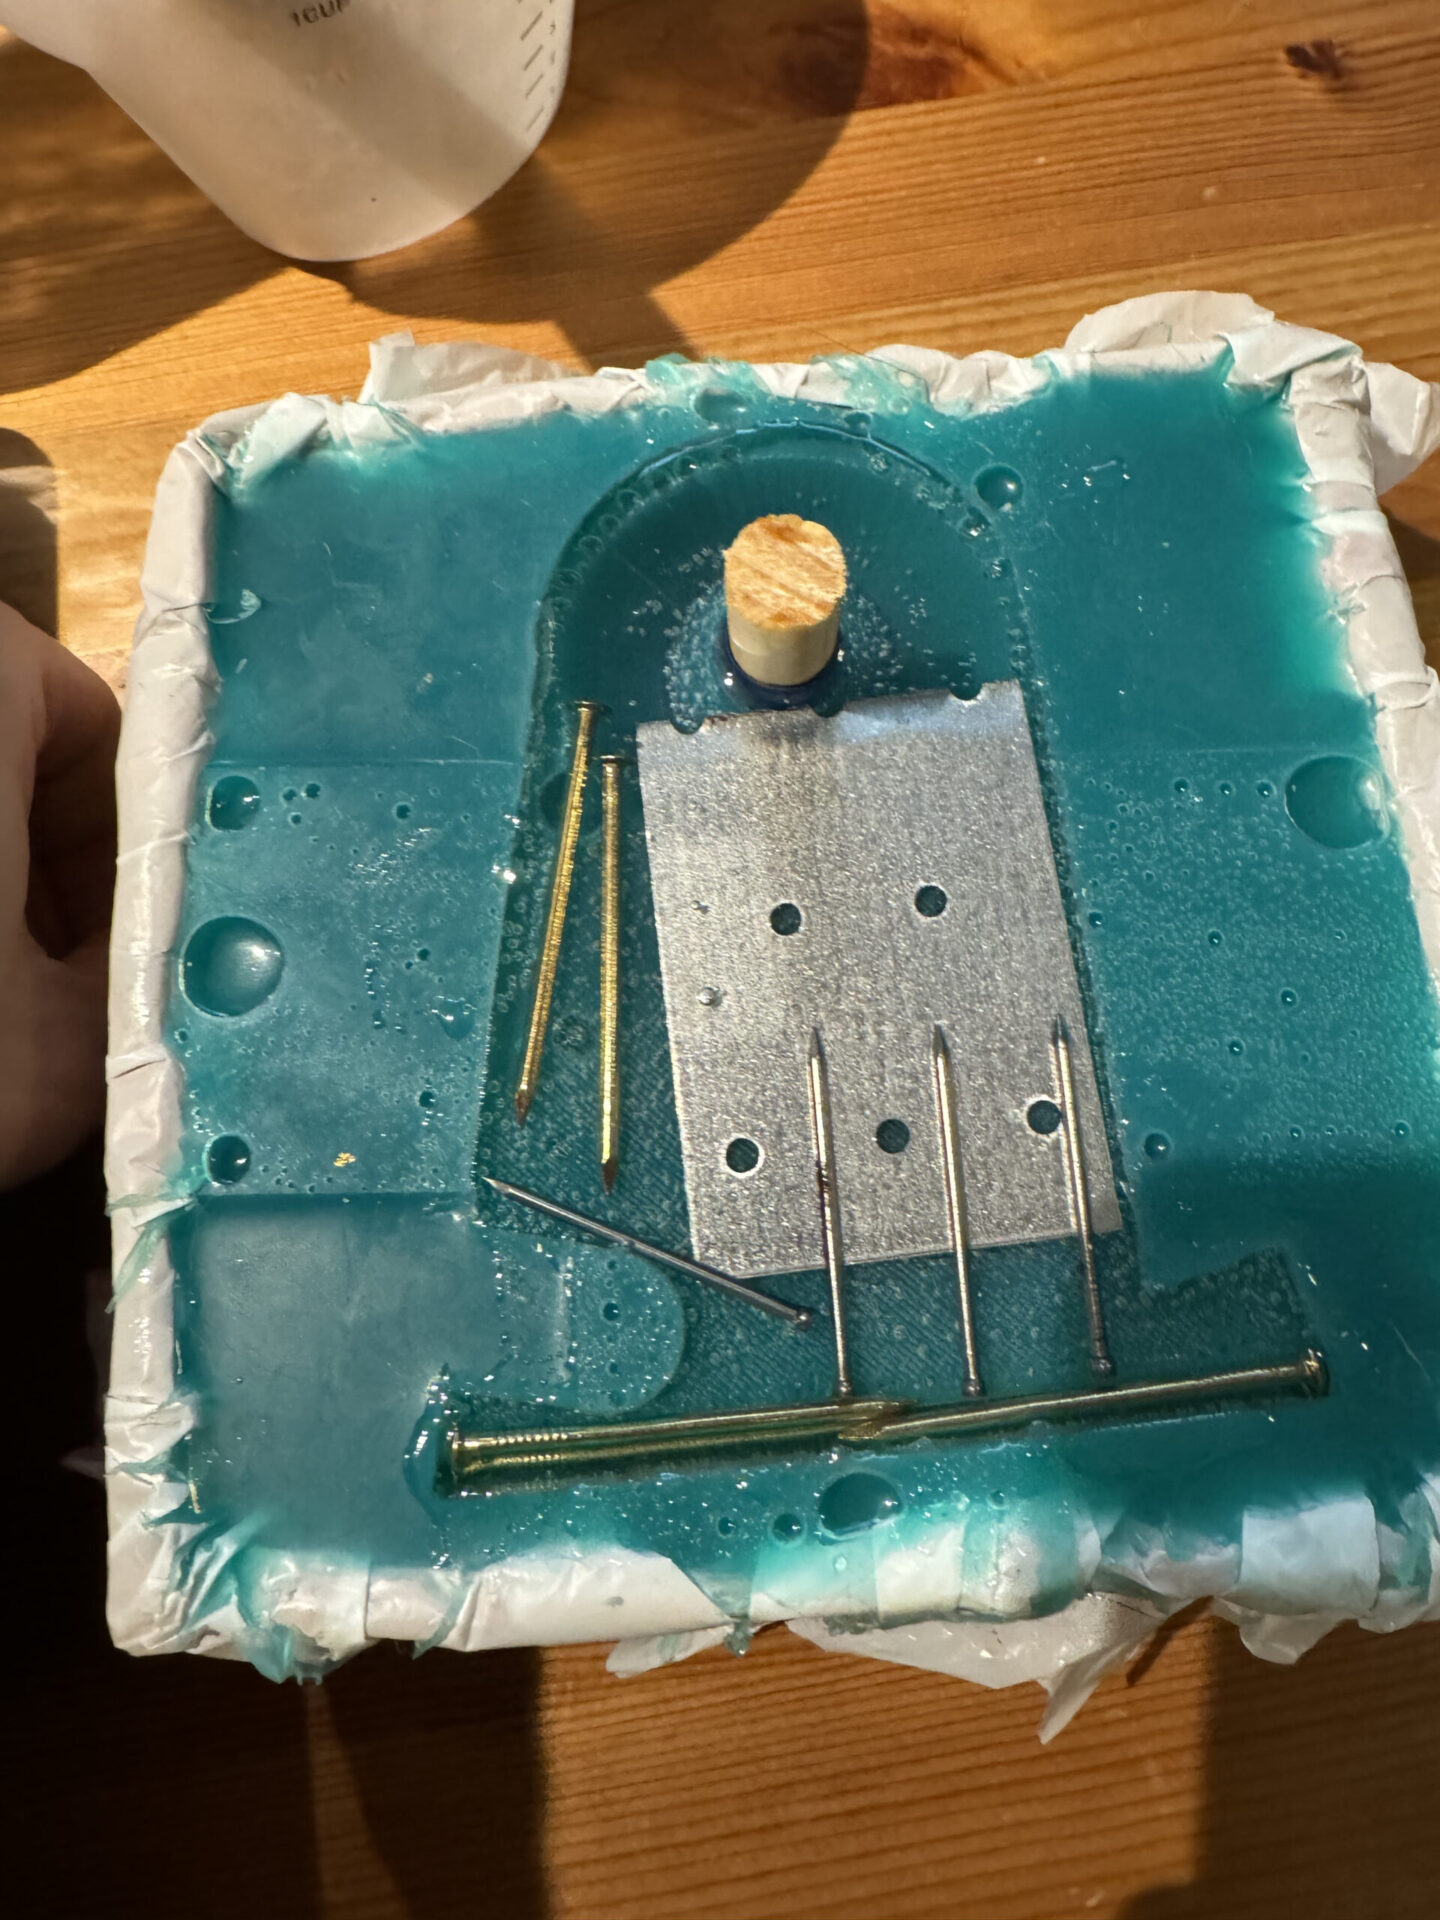
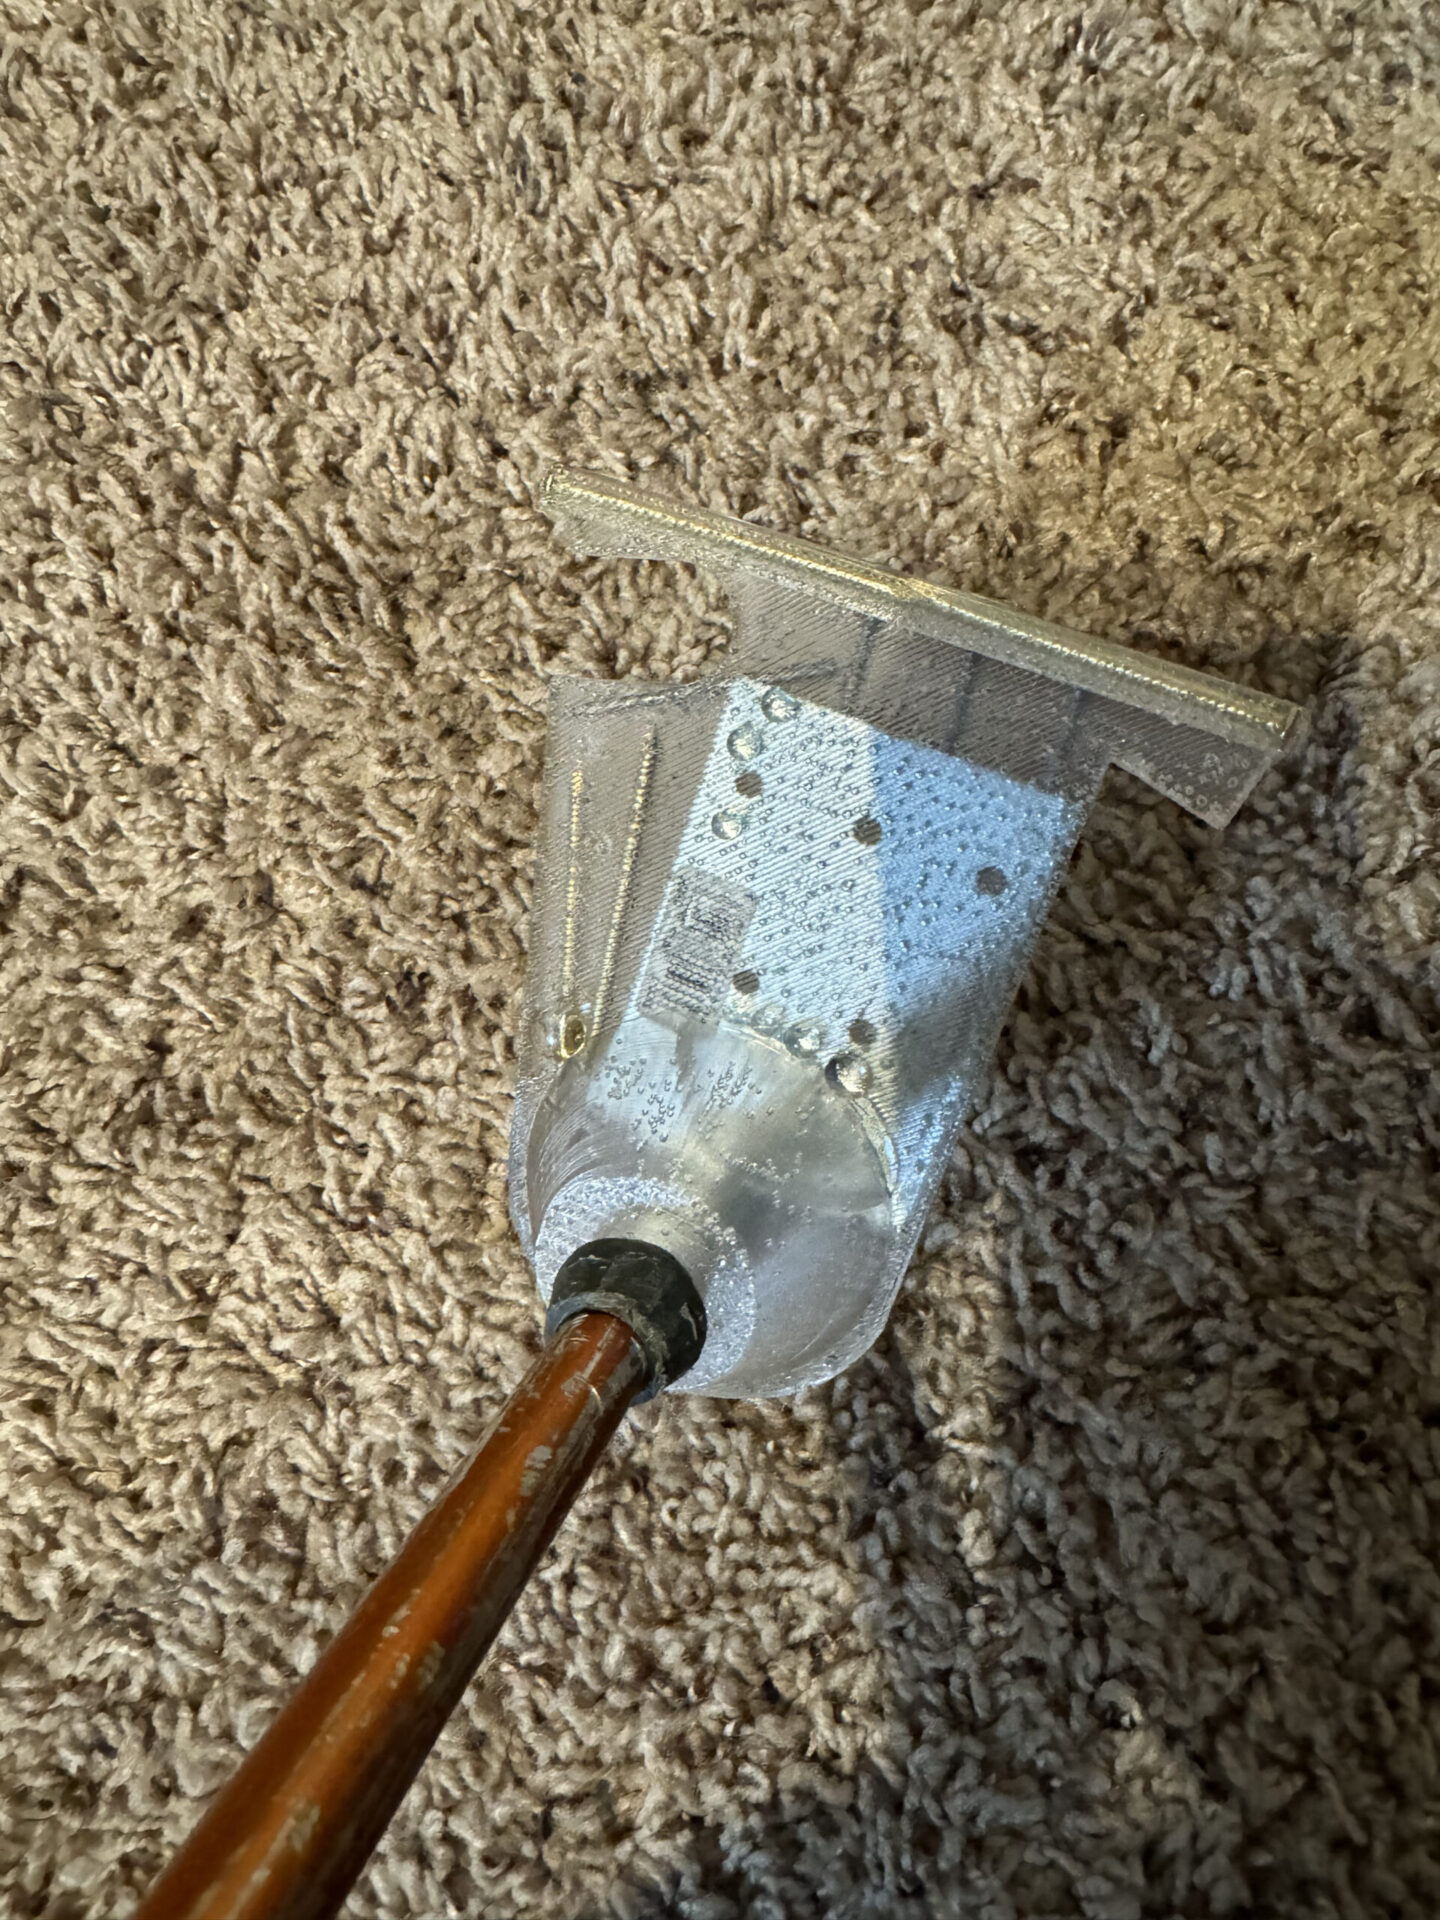
Version 2.1 – Epoxy and Hardware
3D printing models is expensive, so my plan was to print a model that I liked, create a mould, and then manufacture on my own. I was hoping that I could use Epoxy in the mould to at least create tester models to help me adjust the design.
My first version (orange) broke almost instantly at the trailhead. I then sought to reinforce it, using hardware I had in my tool bag. It would make it heavy, but I just needed something that would allow me to test the design.
The 2.1 and 2.2 ‘phase’ of prototyping will definitely fall into the Mad Scientist category… Whatever I had fun.
Version 2.0 – Self-designed and 3D printed
After paying designers twice to make / adjust my product, I realized that I needed to learn how to use CAD myself. So I downloaded FreeCAD and spent a week doing the tutorials. Eventually I learned just enough to make my own prototype.
Version 2.0 is what followed. I designed this model to be completely flat on the bottom so that I could then easily make a mould of it and make my own. I also wanted to test a bunch of features: pole threading, material strength around the pole, the overall size / length, and some cutouts on the side for picking up dropped gloves, messing with your bindings, etc.
The material is not strong enough for use as a basket but I can use it to make a mould.

Re-Prototyping
Learning from version 1, I went back to the drawing board to think of other designs. Leki has a basket with a scraper on one edge, so I bought one to test it. There are some good design elements on their basket (such as a curved lip on edge and second grabber on the back), but it doesn’t effectively scrape the top sheet (or skins).
Here are some of my design ideas I had before starting to model version 2.
Version 1
Finally got a version printed! The hole is too small for the pole, but I drilled it out to make it fit. This material is too fragile for use, but it is a successful proof of concept.

Version 0 – March 2023
The absurd problem of snow on my ski has inspired me enough to take to a solution. I have no delusions that I’ll get a return on this investment beyond my own entertainment. A CAD designer on Reddit volunteered to make me a 3D-printable model, so I’ll give it a go.